We made a workbench for the garage! We needed a good, solid work space out there, and we wanted to be able to move it around for various projects. Store-bought workbenches were just too expensive for us, so we (of course) made a DIY workbench. Here’s what we did.
DIY Workbench Plans and Materials
We followed these plans, and tailored them so that we could add castors to the bottom of our table, and also make it a little wider. Here is our cut list:
- 2×4 cut to 60″ (x2) – for table top long side
- 2×4 cut to 57″ (x2) – for bottom shelf long side
- 2×4 cut to 24″ (x7) – for sides of top table, sides of bottom shelf, and table top frame cross members
- 2×4 cut to 30″ (x4) – legs
- 2×4 cut to 17.5″ (x4) – upper leg doubler
- 2×4 cut to 5.5″ – lower leg doubler
- 1/2″ plywood cut to 27″ x 50″ – bottom shelf
- 3/4″ plywood cut to 30″ x 60″ – table top
We had Lowe’s do all of our plywood cuts for us (since we still don’t have a table saw). Then we followed the building instructions of the plans, and within just a couple of hours we had an assembled table. Seriously!
Building the Workbench
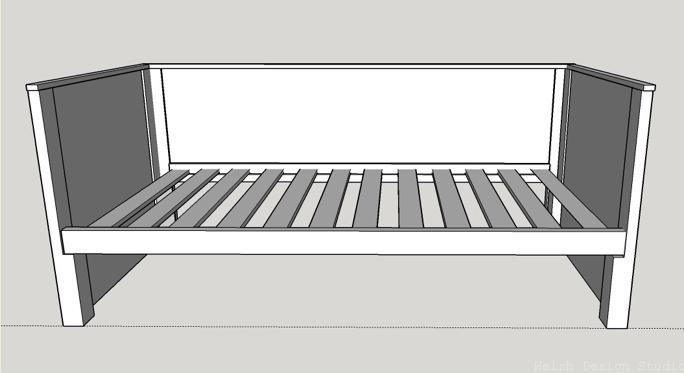
The plan is not only really simple, but also easy to follow! Here are some pictures showing how we built our DIY workbench…
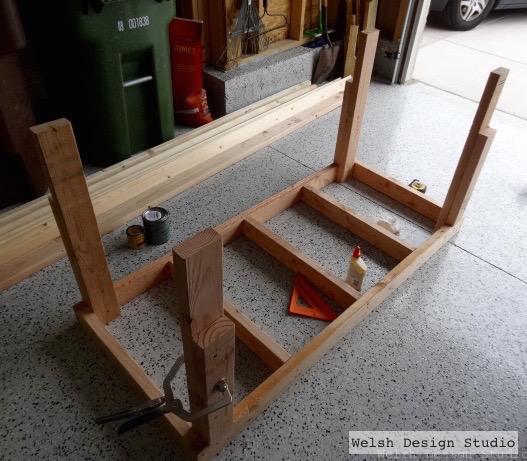
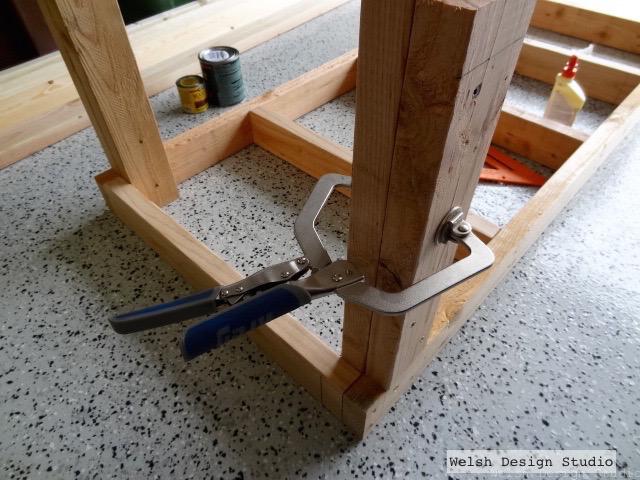
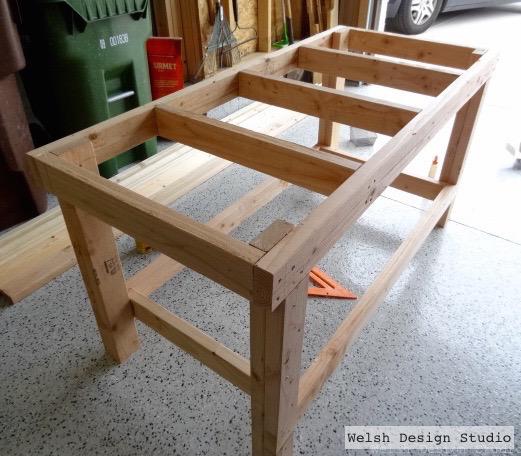
You start by building the table upside down. In this picture you can see the table top frame on the ground, and we have added the 30″ legs, and the 17.5″ upper leg doublers. Using clamps when adding the leg doublers really helps!
If you are adding castors, like we did, you’ll want to do this after you finish building the legs (while the table is still upside down). We did it at the end because we were still waiting for Amazon to deliver our castors, which just meant we had to flip the heavy table over carefully after we had already built it. No biggie, but much better to do it before the flip – hopefully you can learn from our mistake. These are the castors we bought on Amazon. The four of them together hold 600 pounds (more than enough), and they have locking brakes. They roll super smooth, and lock the table solidly into place when needed. Highly recommend!
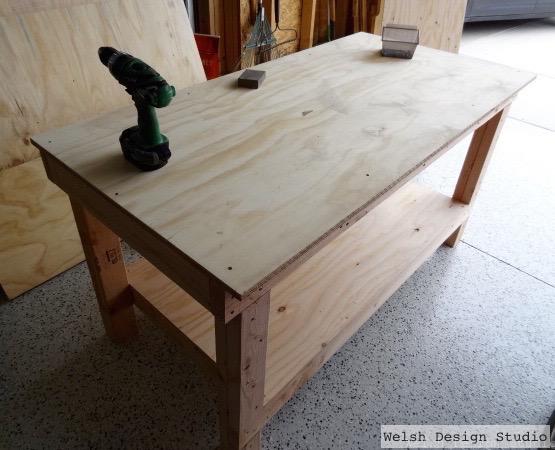
Once you have the legs done and have installed the castors, then flip the table over. Now it’s time to add the plywood bottom shelf and table top.
Once the plywood shelves and top are installed, you will have the finished workbench! Our final workbench measures 30″ wide by 60″ long, by 33″ high. One thing you can do is add a small piece of screen trim around your plywood bench top. We plan to do this a little later on because it will really help finish off the look of the workbench.
I love my our new workbench so much! I’ve already been using it for a little project that I’ll be sharing in a couple of days. If you need a DIY workbench for your garage, give this one a try. It’s super easy, and should last for years to come!