I’ve been on a mission to update our family room and add in a little industrial vibe. I was searching around for an industrial coffee table, and found plenty that were gorgeous and just the right style, but not the right size, and definitely not the right price! So, we made our own! In this post, I’ll share with you the easy instructions we followed so that you can make a DIY industrial coffee table for yourself!
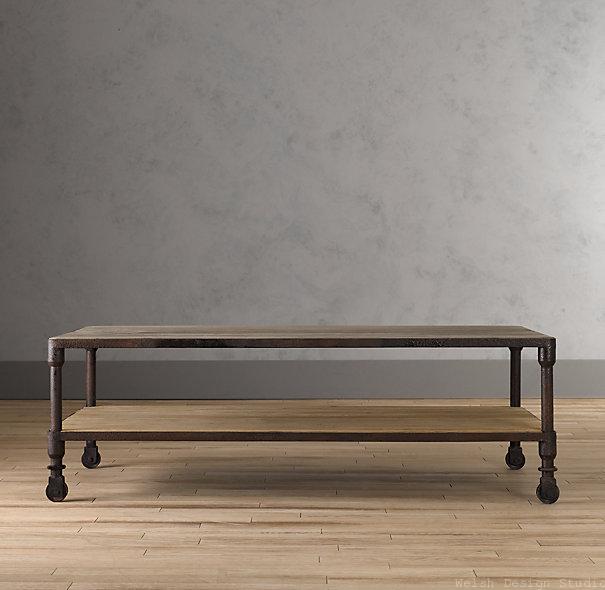
Here is a drool-worthy industrial coffee table from Restoration Hardware. But with a price range of $995-$1595 (depending on the size), I had to pass on it.
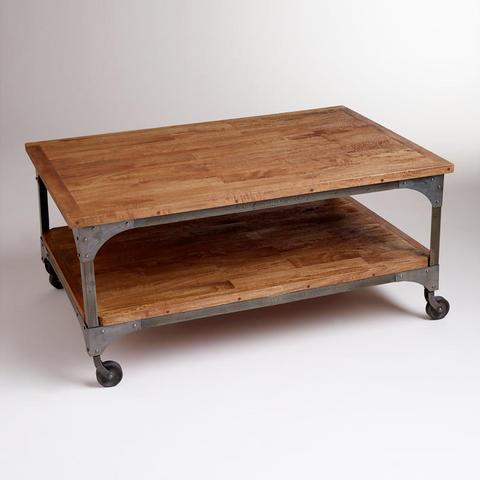
And here is another industrial coffee table that I love from World Market…the Aiden Coffee Table. It’s just a wee bit too wide for our room, but the $289 price is much more palatable.
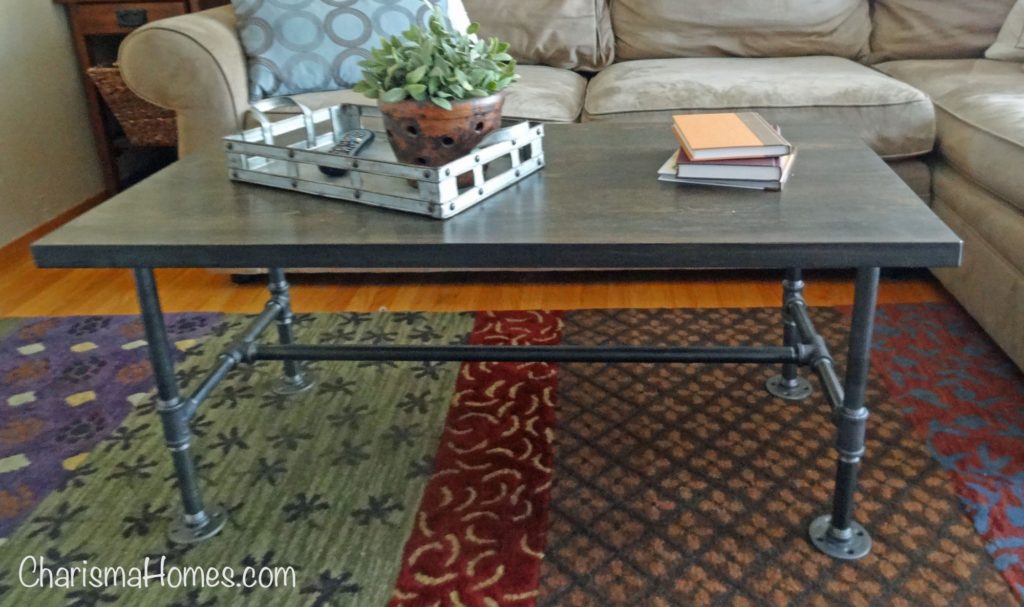
So, what does one do when one can’t find the perfect industrial coffee table with the perfect price…one makes their own, of course! Here’s our finished DIY industrial coffee table…
OK, so I do realize that making furniture is not for everyone, but trust me people, this coffee table is super easy! Let me break it down for you:
Supplies Needed
Note: This list contains affiliate links for your shopping convenience, which means that I may get a small commission on your sale at no cost to you.
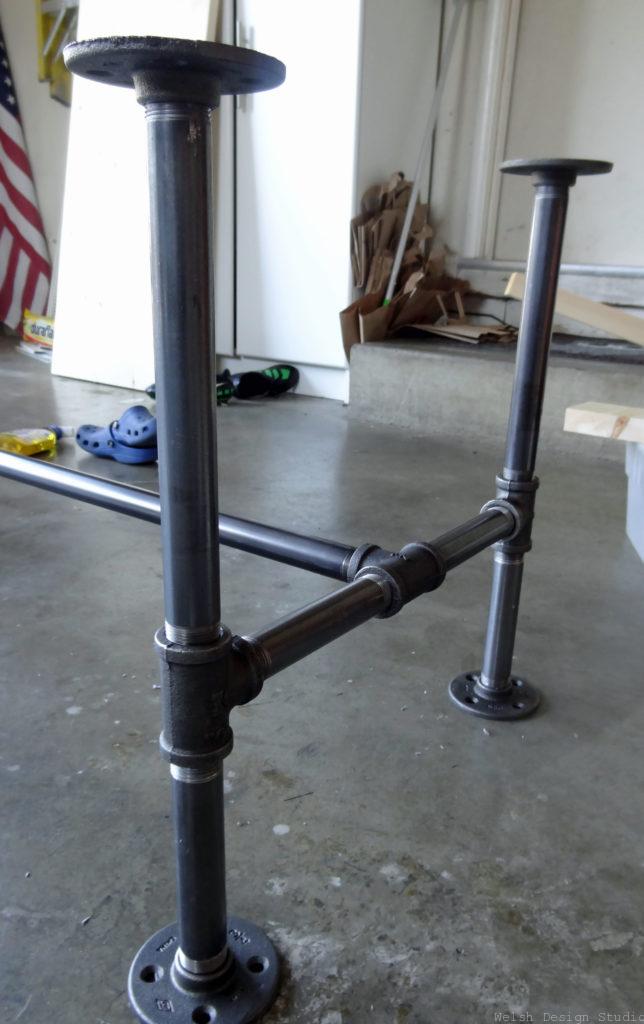
- 6 – 3/4″ diameter black iron tee fittings
- 8 – 3/4″ diameter flange fittings (the circular ‘feet’, and also used to attach the wood top to the pipes)
- 4 – 3/4″ diameter black steel pipe pieces, 6″ long
- 4 – 3/4″ diameter black steel pipe pieces, 10″ long
- 1 – 3/4″ diameter black steel pipe piece, 36″ long (this link is for a 4-pack, but you can buy individual pipe in the stores)
- 1 – 2’x4′ wood project panel top (1 1/4″ thick) You can also get a more expensive, but pre-stained top here.
- 1 small can of wood stain (or two if you like to blend colors, like we do)
- 1 small can of polyurethane (satin finish)
- 1 pkg of 1″ long wood screws
We found all of these items at Home Depot and Lowe’s, with the exception of the wood table top. We found the project panel top at a local lumber yard.

If you can’t find the single table top, you could use 3 pieces of 2″x8″ wood, joined together on the underside with flat metal joiners (also found at Home Depot). Another option is to use butcher block countertop (Home Depot and Ikea both have one) and cut it to size.
Step 1
Screw together pipe pieces, t-joints, and floor flanges to create your pipe frame You’ll want to wipe down the entire frame with some rags to remove the lovely grease that coats the pipes (you may have to do this several times over to get it all off).
Step 2
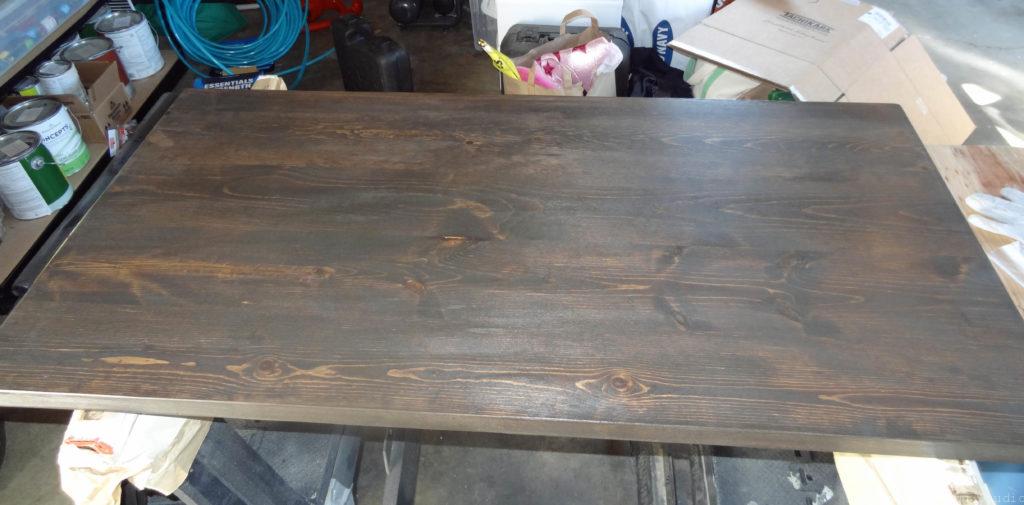
Stain wood table top. We knew we wanted a darkish, grayish wood color, so we used two different wood stains. First, we applied Minwax Espresso stain, and wiped it off after only about a minute. Then we applied Minwax Classic Gray on the table, and left that on for several minutes. We then wiped the table down again to take off all excess stain. We finished up with two coats of Polyeurethane in a satin finish, sanding lightly between coats.
Step 3
Place finished table top face down on a drop cloth or towel. Attach pipe frame to underside of table top using wood screws. You may find, as we did, that the pipe frame is not perfectly ‘square’ when you first put in down on the table top. Just pull and push on the frame, or adjust the tightness of the frame pipes until it’s close enough.
Step 4
The last step is to move the finished table into your room, and admire your handiwork. That’s it! Our overall table dimensions ended up being 22″D x 44″L x 20″H. If you want your table taller or shorter or longer, all you have to do is adjust the length of the pipe pieces and table top that you buy.