
Faux Wood Beams for Ceiling: What to Know Before Installing One
Faux wood beams are one of the easiest ways to add architectural character and warmth to a ceiling…without the cost, weight, or structural requirements of real wood beams. Because they’re lightweight and designed to install directly over drywall, faux wood beams for ceilings have become a popular choice in kitchens, living rooms, dining rooms, and open-concept homes.
Today I’m sharing how we installed a faux wood beam in our kitchen, along with what I wish I had known before starting. If you’re considering adding faux ceiling beams to your home, this walkthrough should help you decide if they’re right for your space…and feel more confident tackling the install.
Why We Chose a Faux Wood Beam for Our Kitchen Ceiling
Drumroll, please…we installed a faux wood beam in our kitchen! Yiiiipeeee!
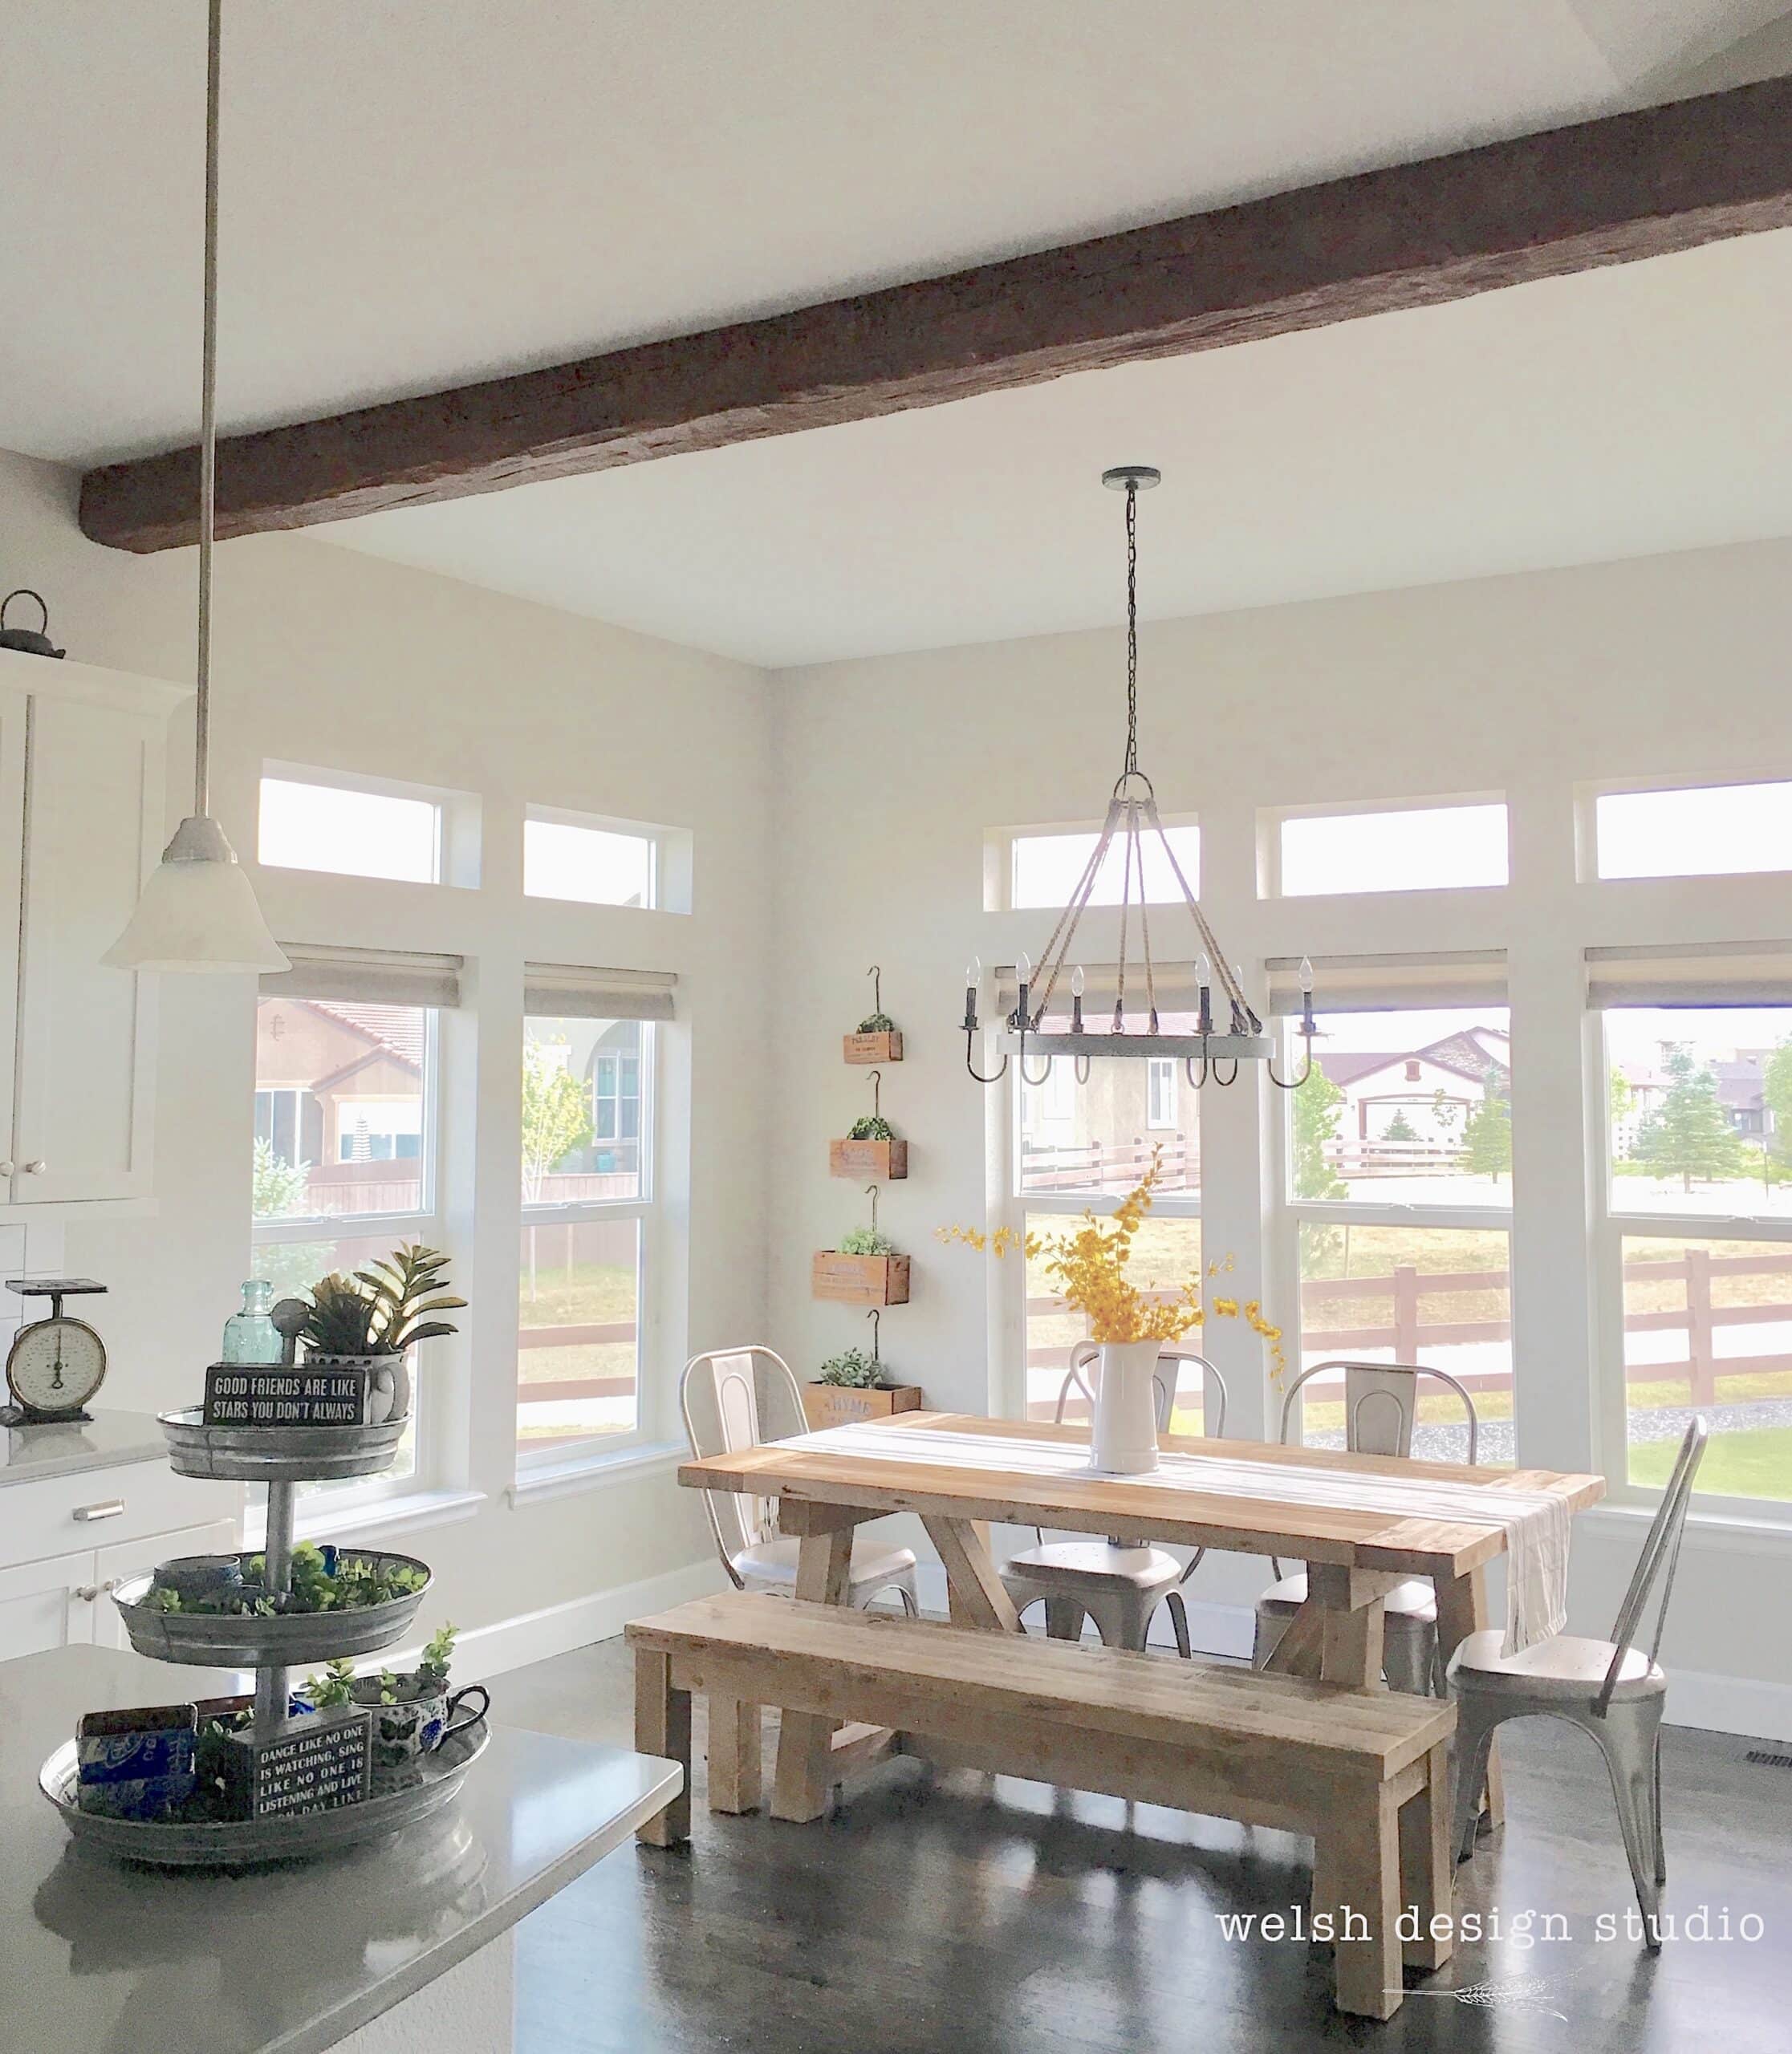
I’ve always loved the character an aged beam adds to a home, and I had the perfect spot picked out—right between our kitchen and dining area. The beam creates a subtle visual separation between the two spaces while adding a touch of farmhouse charm to both rooms.
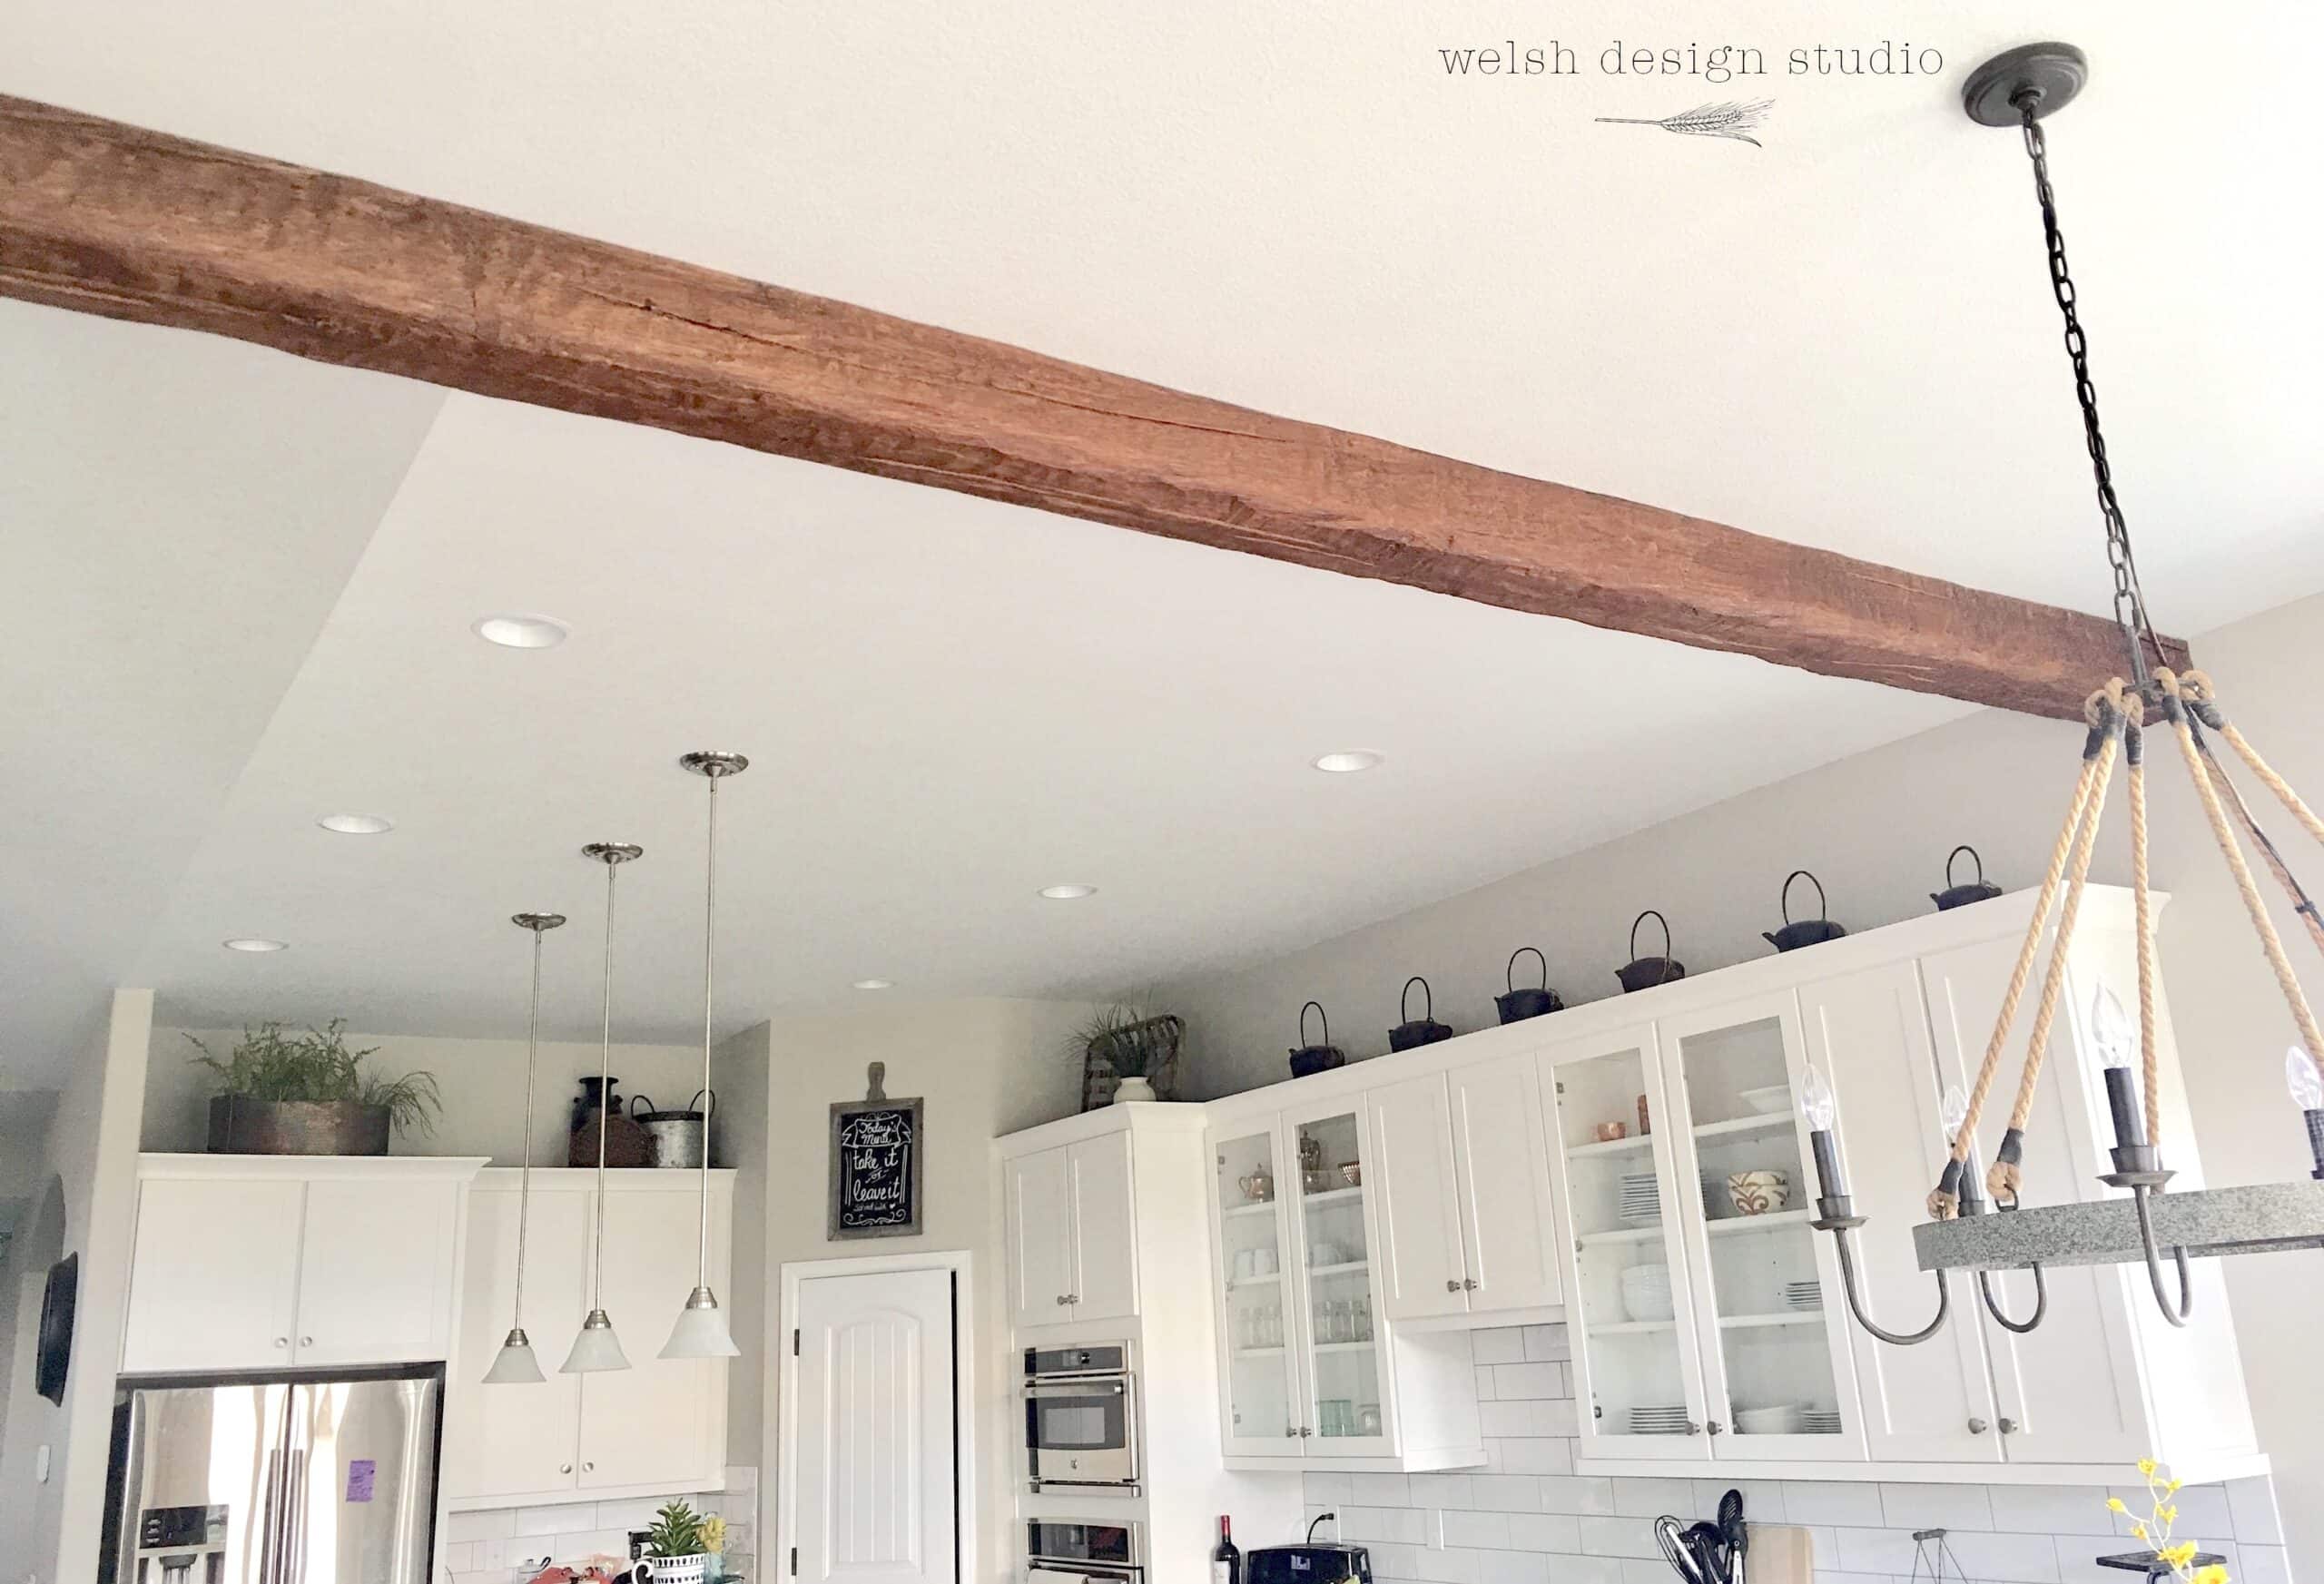
We chose a long faux wood beam from Home Depot, which (surprisingly) is made from polyurethane foam. Even though it’s lightweight, it’s molded to look like an old barn beam, complete with realistic texture and variation. Once installed, it genuinely looks like real wood.
Pros and Cons of Faux Wood Beams for Ceilings
Before getting into the install, here’s a quick breakdown of the pros and cons based on our experience.
Pros
- Lightweight and easy to handle
- No structural changes required
- More affordable than real wood beams
- Realistic texture and finish
- DIY-friendly installation
Cons
- Cutting the beam to length is the hardest part
- Ends aren’t always perfectly square
- Seams and screw holes require careful finishing
Overall, the pros far outweighed the cons for us, but cutting the beam deserves its own warning (more on that below).
Faux Wood Beams vs Real Wood Beams
It’s important to note that faux wood beams are decorative, not structural. If your goal is to add visual interest to a ceiling without opening up walls or reinforcing framing, faux beams are the way to go.
Real wood beams require engineering, structural support, and significantly more labor. Faux wood beams give you the look…without the headache.
Where Faux Wood Ceiling Beams Work Best
Faux wood beams can be used in a variety of spaces, including:
- Kitchens (over islands or between rooms)
- Dining rooms
- Living rooms
- Vaulted ceilings
- Open-concept floor plans
They’re especially effective when placed strategically to define spaces or highlight architectural features.
How to Install Faux Wood Beams on a Ceiling (Step-by-Step)
Here’s exactly how we installed our faux wood beam, from start to finish.
Step 1: Watch an Installation Video
There’s a helpful installation video that you can watch here. It lays out all of the steps, and makes it look really easy, so you’ll feel pretty confident going into things.. Watching it made everything feel much more approachable and gave us a clear sense of what to expect.
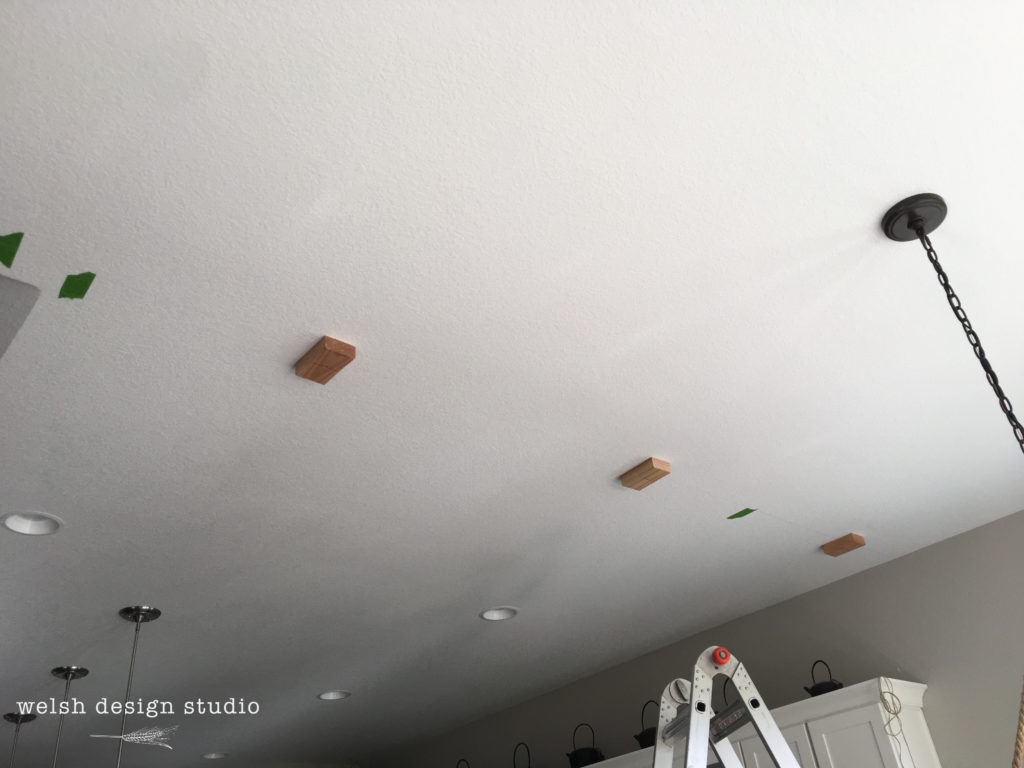
Step 2: Lay Out the Beam Location
We measured and marked the location for each end of the beam on the ceiling. Then we snapped a chalk line down the center of where the beam would be installed.
If you don’t already own a chalk line tool, it’s worth picking one up. It made this step much easier and more precise.
Step 3: Cut the Faux Wood Beam to Size (The Hardest Part)
I’m not going to sugarcoat this part…cutting the beam was frustrating.
The beam itself cuts easily with a saw, but the ends weren’t square to begin with. Getting a clean, straight cut that sat flush against the wall took multiple tries. We eventually used a 90-degree angle tool to draw vertical guide lines and carefully cut along them.
Even then, the beam was slightly too long when we test-fit it. Instead of recutting, I used a sander to shave off about 1/8 of an inch. When it finally fit snugly between the walls, the sense of relief was real.
This step alone took about three hours. The actual installation? About 15 minutes.
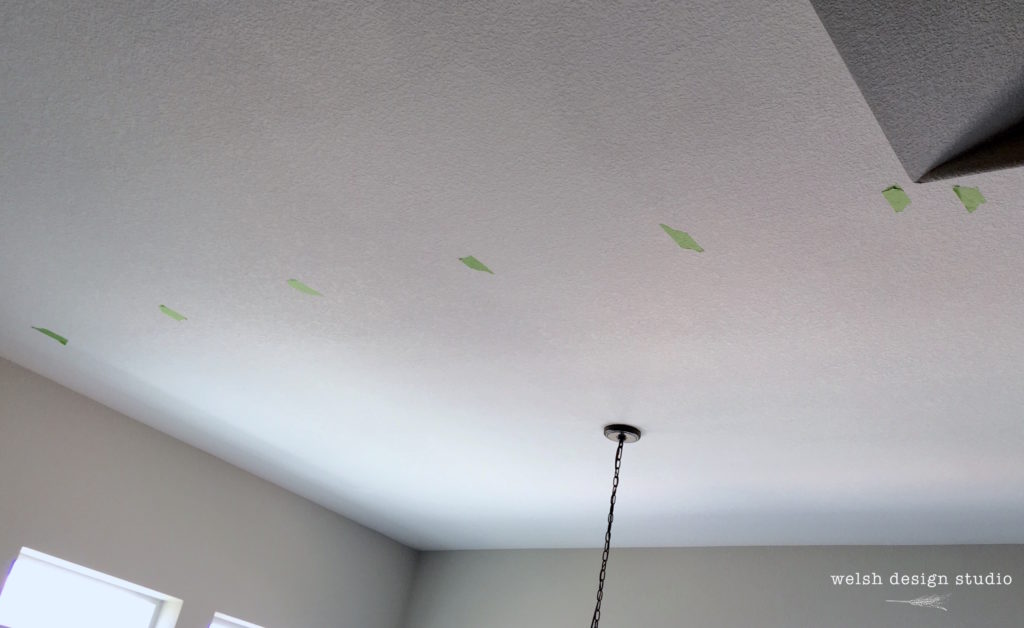
Step 4: Locate Ceiling Studs
If you’re lucky, your ceiling joists will run perpendicular to the beam, like ours did. This allows you to screw mounting blocks directly into studs.
If not, don’t panic—molly bolts can be used to secure the mounting blocks into drywall. Mark stud locations using painter’s tape so they’re easy to see during installation.
Step 5: Cut the Mounting Blocks
The manufacturer recommends placing mounting blocks every 3–4 feet. We ended up using four blocks total.
Each block was cut to fit inside the hollow cavity of the beam. Because the interior dimensions varied slightly along the length, each block had to be sized individually—but this wasn’t a big issue.
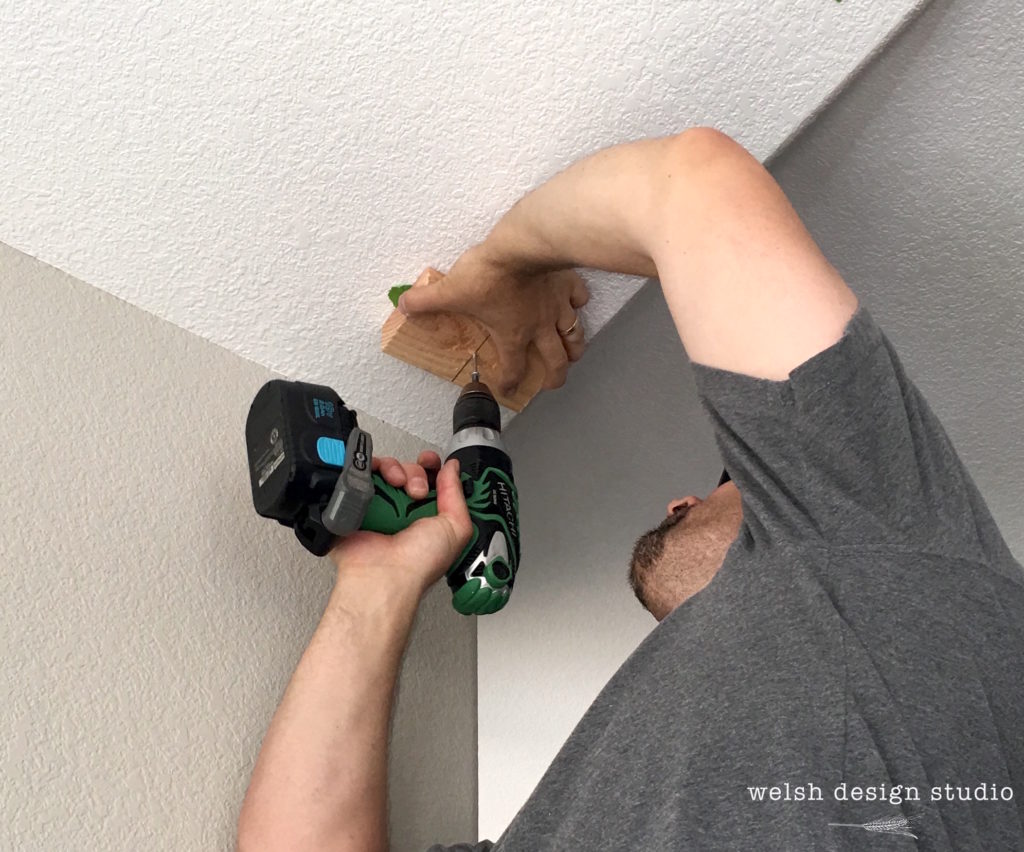
Step 6: Install the Mounting Blocks
We screwed each mounting block into a ceiling joist using 3-inch screws, aligning them carefully with the chalk line snapped earlier.
This step sets the foundation for the entire install, so take your time here.
Step 7: Install the Faux Wood Beam
Once the mounting blocks were in place, we lifted the beam over them and secured it using 2-inch screws driven into each block.
After filling the screw holes with matching wood putty, the beam looked seamless. This step was by far the easiest (and most satisfying) part of the project.
Are Faux Wood Beams for Ceilings Worth It?
Absolutely. Faux wood beams are one of those upgrades that add instant character without requiring major construction. Once installed, they become a subtle but impactful design feature that elevates the entire space.

FAQs About Faux Wood Beams for Ceilings
Can faux wood beams be installed on drywall ceilings?
Yes. Faux beams are designed to be lightweight and can be installed over drywall using mounting blocks and anchors.
Do faux wood ceiling beams look real?
From normal viewing distance, they look surprisingly realistic—especially when finished and installed properly.
Are faux wood beams purely decorative?
Yes. They are not structural and should not be used to support weight.
Final Thoughts
If you’re looking for a way to add warmth and architectural interest to your ceiling without the complexity of real wood beams, faux wood beams are a fantastic option. Just plan extra time for cutting and fitting, and the install itself is very manageable for DIYers.
Hope you all have a wonderful weekend—we’ll be staying home, working on more projects, and occasionally glancing up at our ceiling to admire our faux wood beam.


I love the look of this beam – totally does look like real wood – and the way it defines the two spaces with an architectural element. I think sometimes we don’t think enough about the ceiling and how it effects our experience of a space. Thanks for sharing this! 🙂
Thanks! It really is amazing how real it looks in person! Just by adding that one beam to the ceiling, the entire look and feel of the room is now more cozy.
Great idea, I often have thought that beams like this would add so much character…..this single one works perfectly, and there are cases in large rooms where four or so would be perfect if the ceiling is high, like in a old stone house. Thanks for sharing on craft schooling Sunday, i really had no idea that “faux” was an option, so great to know!
It definitely adds a lot of character! Faux beams are not only much more affordable than the real thing, but also really lightweight and easy to work with. I can’t imagine trying to hoist a real beam up to the ceiling! The great thing is that no one call tell it’s fake just by looking at it!
I love the contrast between the beam and your bright airy space! So pretty. 🙂
Thank you! It’s amazing what a difference the beam makes in the whole look and feel of the room.
It looks like it’s always been there 🙂 I had to smile when I read that it was polyurethane foam because I bought an old apartment when I first moved to Denmark, partly because of its beautiful crown moulding. Imagine my surprise when I went to paint the living room and discovered it was made of polyurethane foam! My new (c.1899) apartment has the real deal and I’ve spent a fortune having it restored 🙁
Oh my! Foam crown moulding would be quite a surprise! Hopefully no one will want to paint this foam beam in the future. 🙂
I LOVE the beam! I have been considering adding one or two to our house as well, but just haven’t been brave enough yet. Thanks so much for sharing the how-to.
Thanks! It took us a few days to get the nerve up to tackle this project, even when the beam was already lying in our garage. 🙂
This looks beautiful. I pinned it!
I’d love for you to share it at Talk of the Town at Knick of Time. The party starts tomorrow at 7pm central time here – http://knickoftime.net/
Thanks Angie!
I want to install faux beams in our living room, so I was very glad to read your post. Thank you for sharing!
If you decide to install the beams, let us know how it goes! We are certainly enjoying our new beam!
very cool idea!
Thanks!
Oh wow, it looks great…………and so does your kitchen and dining room area……….
Don’t you just love how a small change like that can make such a difference.
Blessings, and Happy 4th of July,
Nellie
Thanks Nellie! We are really enjoying the beam, and how much character it adds.
This looks so great!
I would love for you to share this with my Facebook Group for recipes, crafts, tips, and tricks: https://www.facebook.com/groups/pluckyrecipescraftstips/
Thanks for joining Cooking and Crafting with J & J!
Thanks!
Your beam looks fantastic. What a great project. Thanks for sharing it on Show + Tell. xo
Thank you!
Wow! That looks amazing!
Thanks Kate!
What a difference adding the beam makes and it looks like it was always there. Thanks so much for sharing your DIY ideas with us at #BloggersPitStop. I have shared on social media. Have a great week and see you at next week’s link up! Sue from Sizzling Towards Sixty & Beyond
http://www.sizzlingtowardssixty.com.au
Thanks so much! It’s amazing how natural the faux beam looks in the room!
Our house has those type of beams throughout our living room, dining room & kitchen. Real wood though. lol. Yours looks great though.
http://therantingsofadramaqueensmum.blogspot.com
Real wood would be amazing! I can’t imagine how hard it would be to install solid wood beams (so heavy), so you are lucky if you have them already! 🙂
What a gorgeous outcome! I love that it seems like it’s easy for all to do, and that it still looks amazing up on the ceiling. I bet everyone is going to enjoy this! Thanks for sharing it with us on The Creative Circle Link Party!
Thanks Iris! The faux wood beam is surprisingly easy to install (once you get it cut right). Definitely a good candidate for a DIY project, and one that adds so much character!
I’m so happy to have found this post . . .thank you. Very interesting 🙂
Thanks Connie!
I absolutely love this idea, and the tutorial provided. It adds just the right touch to your farmhouse kitchen:) Shared on Facebook! Thanks for sharing at Vintage Charm! xo Kathleen|Our Hopeful Home
Thanks Kathleen! We love our new beam!
Oh gosh, I absolutely love it! I wish I could do this in my kitchen, but it wouldn’t work. it drops down from a 25 ft. ceiling in the family room. Thanks so much for sharing with SYC. I will be featuring you tomorrow.
hugs,
Jann
Thanks Jann!
A beam adds tons of character and warmth to a room. You have really done an exceptional job with this.
Thank you, Mary! It really has added so much character to the room!
I have seriously wanted to do this on my kitchen ceiling ,But my master bathroom plumbing is directly above my kitchen & I’m scared that drilling in those wood blocks I may hit a pipe & cause a huge flood in ceiling & ???
Hitting a pipe would be awful! If you can find the studs in your ceiling, you shouldn’t hit any pipe, but better safe than sorry!
This looks so amazing! Sounds like a doozy to install but seriously the final product is gorgeous!!
We are wanting to install beams in our home. Where did you buy your beam?
We bought ours from Home Depot, and had it shipped to our house. Click here for a link to the product. Good luck with your project!