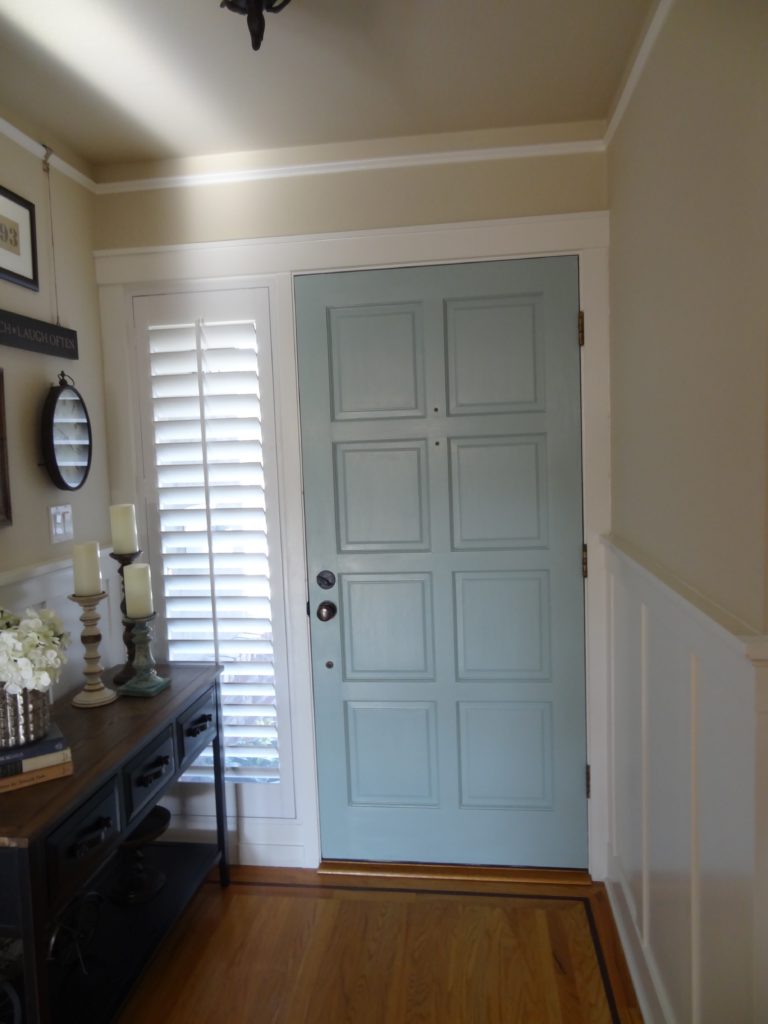
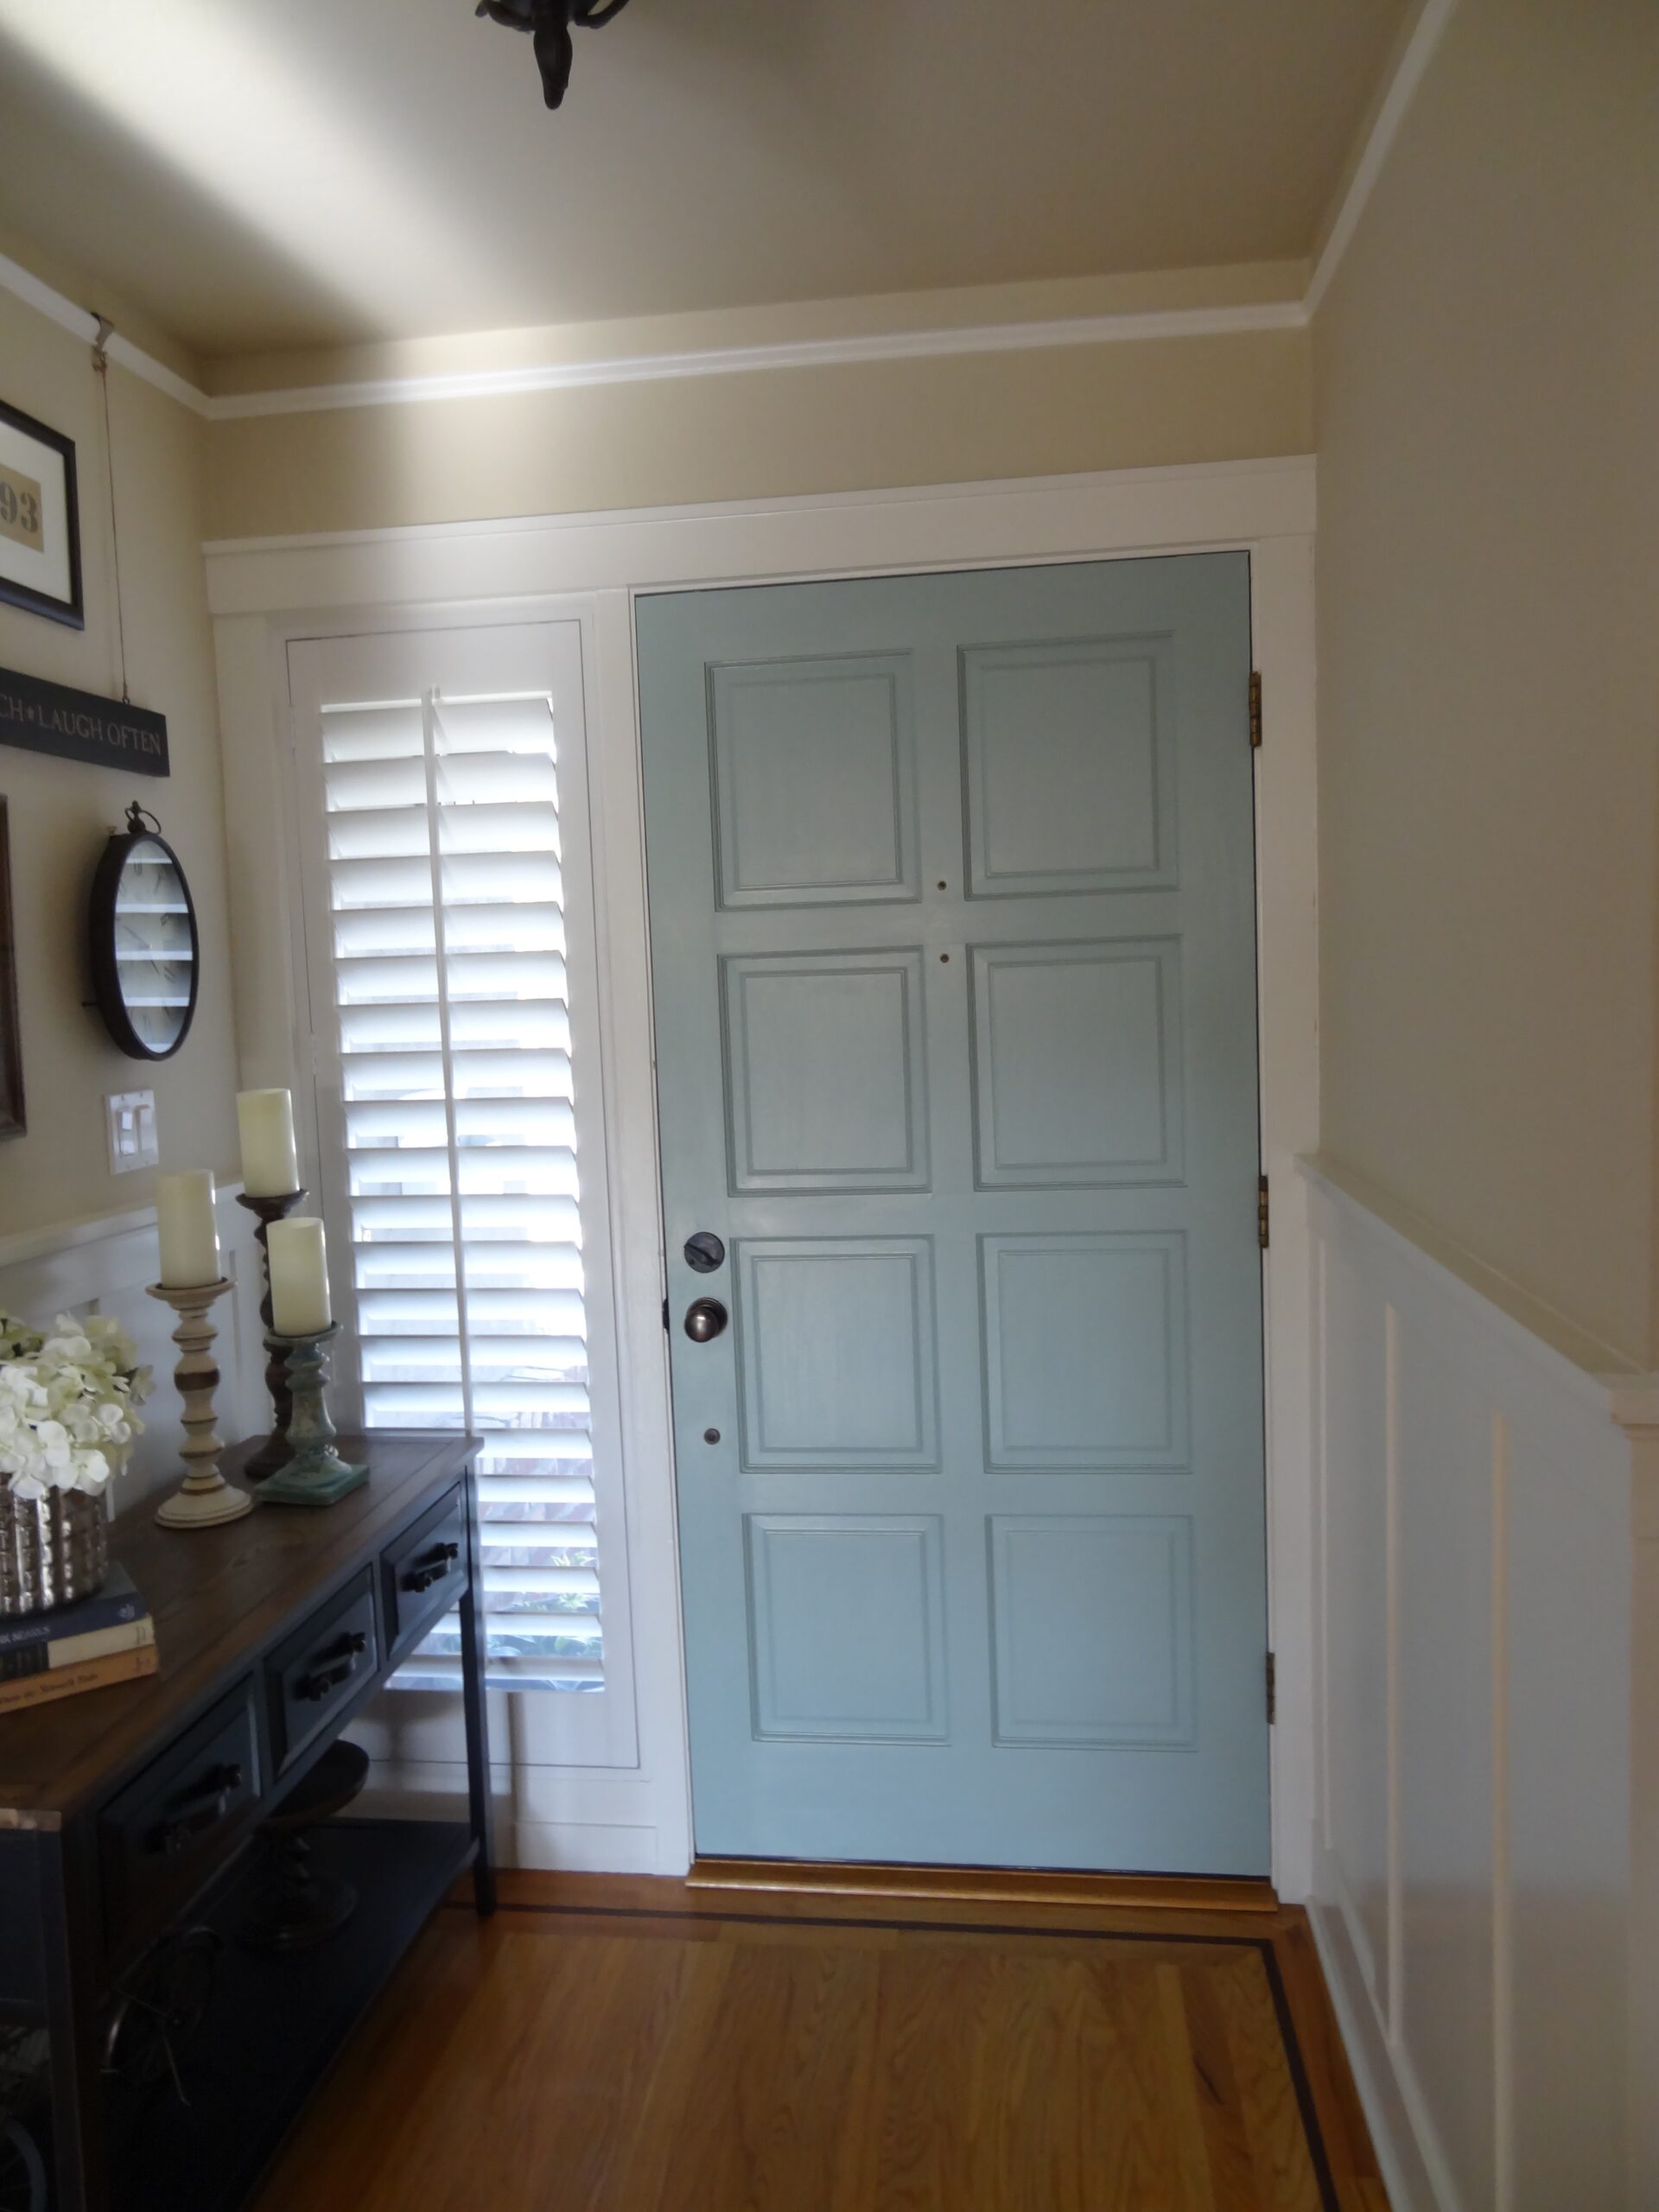
Lots of people paint the outside of their front door, but not many people think about painting the inside of their front door. You’d be surprised, though, just how much character it can add to your entry! Today I’m going to share with your our new and improved front door, painted with BM’s Wythe Blue. I’ll also share the super simple steps we took to paint our lovely Wythe Blue front door, so you can create your own front door masterpiece.
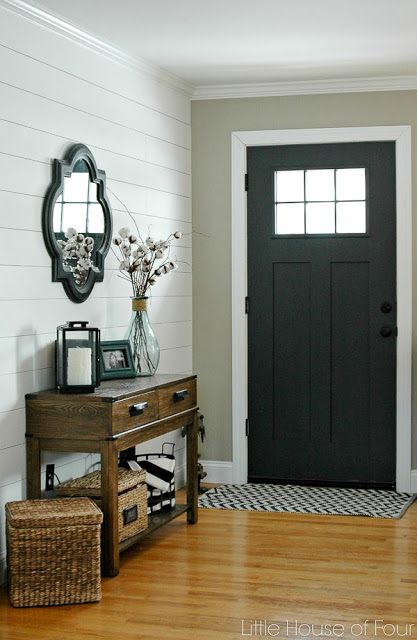
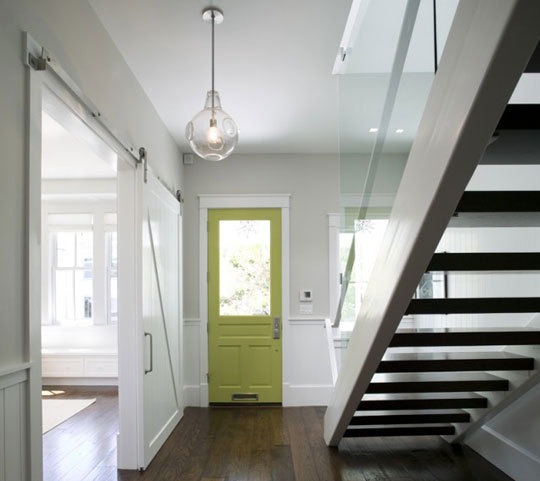
But first, a little inspiration! Painting the inside of your front door is a great way to add some color and a little more drama to your entry. You can paint it a bold pop of color that works with your color scheme, or paint it black for a beautiful contrast. Here are a few pictures I used to convince my husband that painting the inside of our front door was worth a try.
I just love this bright turquoise door with the white trim and gray walls!

Here’s a beautiful door painted black. It’s such a great way to make a statement in a neutral space.
This lime green door really stands out in this light, neutral gray and white interior. If you added a cute rug with some similar coloring, you’d have a beautiful and cohesive entry to welcome your guests!
Click this link to see my blog post with more painted door inspiration.
Before & After
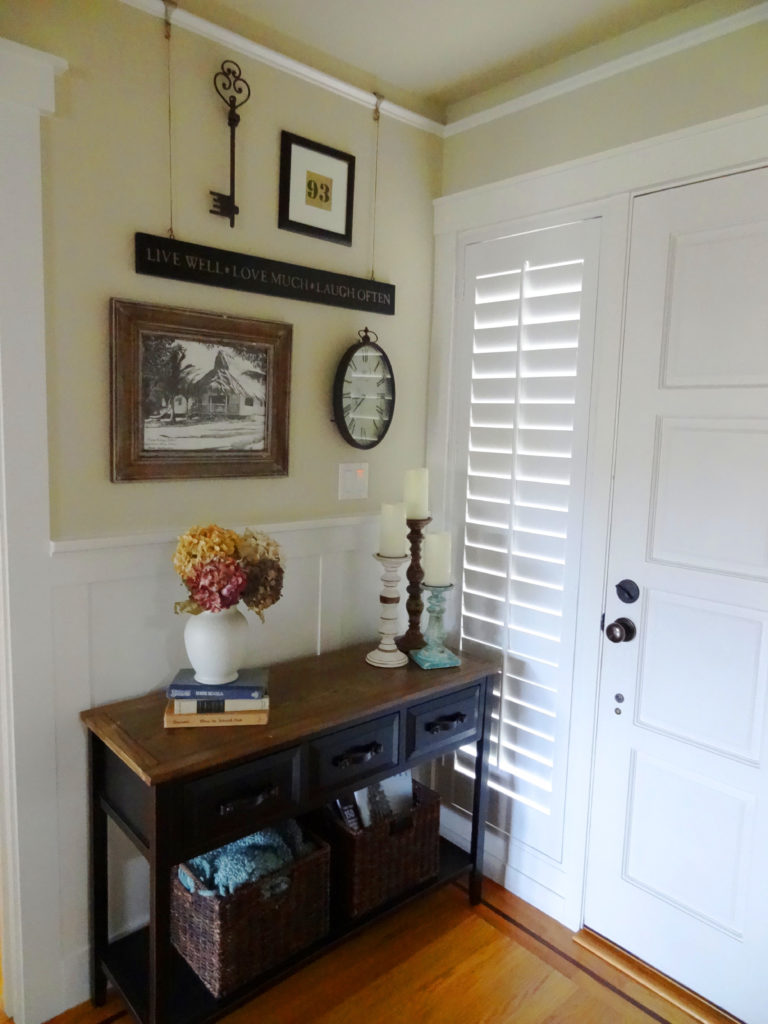
How did our Wythe Blue front door come about? Well, we updated our entry a few months ago, and I still love it, but decided that it just needed a little something to really finish if off. I had some turquoise decor already in the space, with my candlestick and blanket in the basket, and thought bringing that same color to the front door would look amazing. So, I decided it would be a quick and fun transformation to paint the inside of the front door. I figured, it was only paint, and I could always change it back if I didn’t like it. But, guess what? I love it!
Here are the before and after pictures. Scroll down further for some how-to instructions.
How to Paint the Inside of Your Front Door
1. Start by giving the interior of your door a light sanding all over.
All DIY home improvement projects seem to have a little unexpected surprise, and this door project was no exception. I started by giving the interior of our front door a light sanding to roughen it up a bit (and help the primer and paint adhere better). Unfortunately, huge flakes of paint started coming off! I’m guessing this is because the previous owner put latex paint directly over an oil-based paint (without priming first). It meant that I had to do a LOT more sanding to get the flakes off. Big bummer. Hopefully, this won’t happen to you!
2. Wipe off door with a damp cloth or tack cloth to remove sanding residue
When I finished all the sanding, I wiped down the door with a damp cloth and let it dry before applying my primer. A tack cloth is another great product for removing dust or sanding residue. You might want to use gloves with a tack cloth, however, because it is oily.
3. Tape your door hardware and hinges
If you are comfortable removing your hardware, that’s great, but if not, just use some painter’s tape to cover all of your door hardware and hinges. I prefer Frog Tape for this because of how well it prevents paint from bleeding under the tape.
4. Prime
Use a good quality primer to prime the interior of your door. The reason this step is so important is because of our experience with step #1. Unless you painted it yourself, you can’t be certain what type of paint was used on the interior of your door previously. You don’t want to go to all the effort to paint your door, and then have it flake off because you didn’t use a primer.
5. Paint
After the primer dries (1-2 hours), put on two coats of your paint. We used Benjamin Moore’s Wythe Blue (love that color!). Let the first coat dry fully before applying the second coat, and be sure to remove your painter’s tape right after you apply the second coat. Why? Because if you let the paint dry fully and then remove the tape, sometimes it will take a little bit of your dried paint with it.
Need to get some paint samples? You can’t beat the price and ease of using peel-and-stick sample sheets from Samplize! I highly recommend using these sheets to sample paint colors before committing to one.
Need more paint color ideas? Check out all of our Paint & Color blog posts.
Our Wythe Blue front door makeover was such an easy, and fast project! I just love the way it turned out, and I highly recommend giving it a try. The pop of color will add a ton of character to your entry. Plus, it’s only paint, and you can always change it!



Thank you for sharing this informative article! All the information provided by you is really very helpful for all. I agreed that tack cloth is the best cleaning tool. It is helpful for removing tiny dust particles from the surface and gives you better paint finishing. Keep posting! Keep sharing!
Love these door colors!!
Such an informative blog! One thing I would like to say that before starting painting we should keep our project dust-free by using a tack cloth, it will make your work easier. Thank you for sharing! I will share it to all my friends and relatives. Keep Posting! Keep Sharing!