I can’t tell you how happy I am to be writing this post today! Our laundry room makeover is finally DONE! This project seemed to go on forever! It all started back in May when I finally got fed up with the single wire shelf in the laundry room, and made plans to renovate the entire room.
Three months later, and we have finally finished up all the little details! I suppose we had quite a bit of down time in those three months while waiting for cabinets, then tile, and then our butcher block countertop, but it just seemed like this renovation took a really long time to complete.
Today I’m sharing the ugly ‘before’ picture, followed by lots of beautiful ‘after’ pictures.
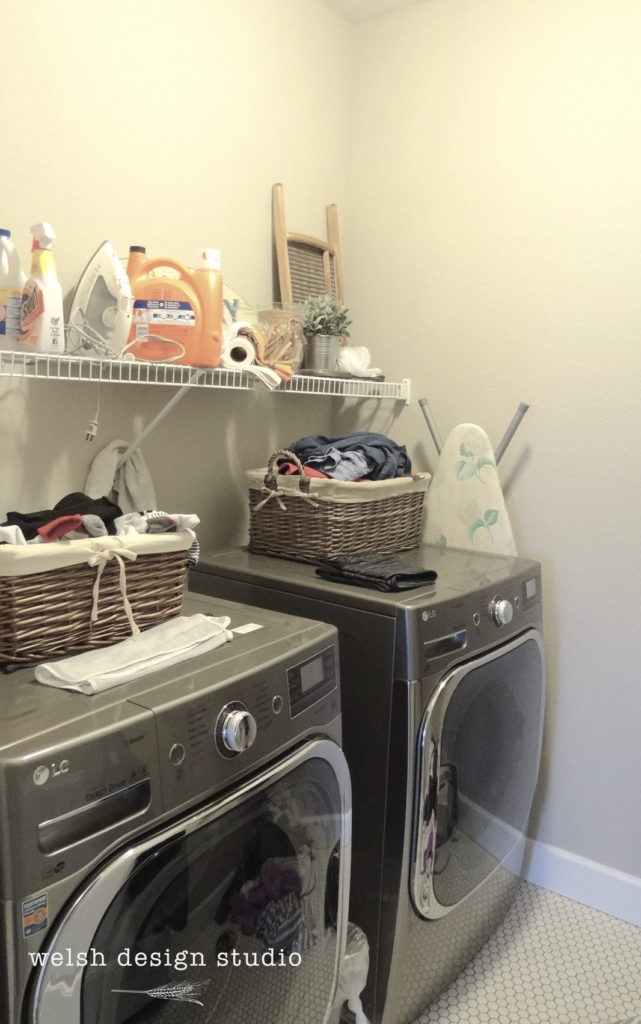
Before
Here is what our laundry room looked like back in May. One word…cluttered.
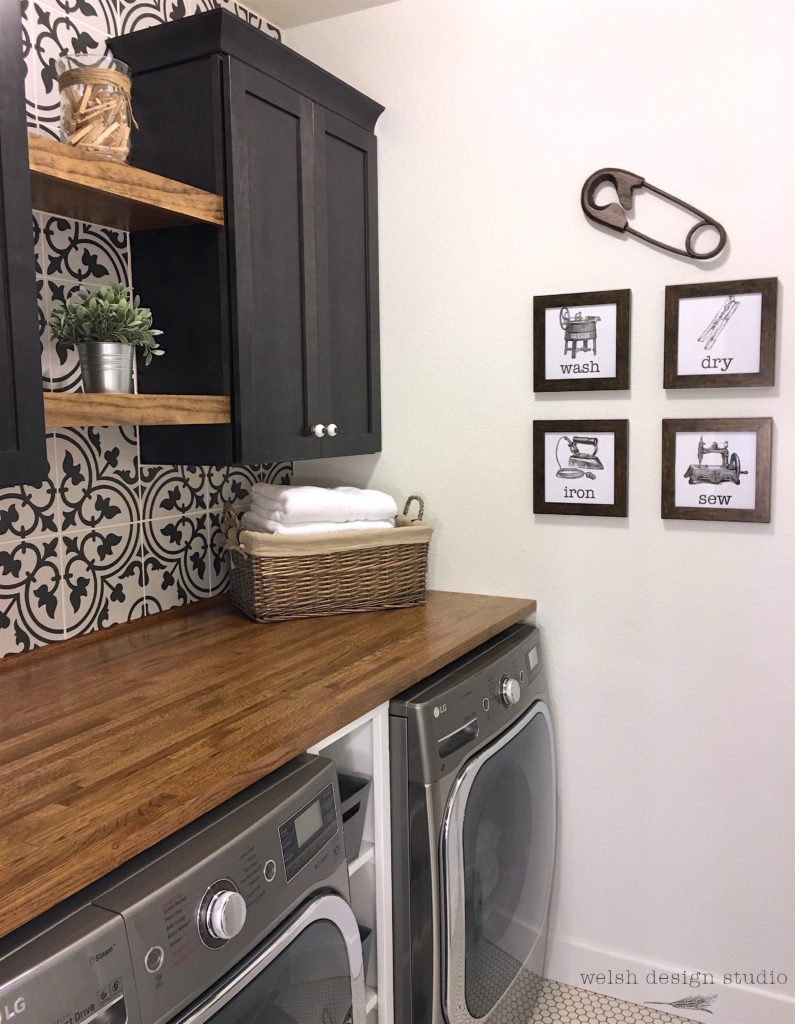
After
And, here it is…our new, and vastly improved laundry room!!
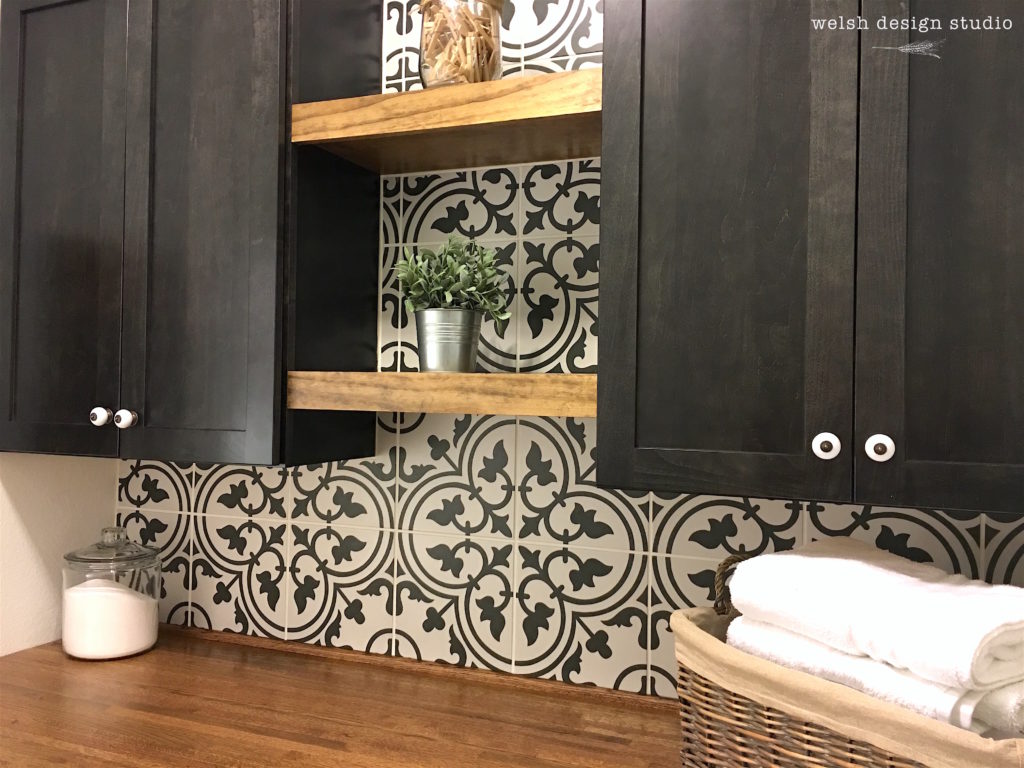
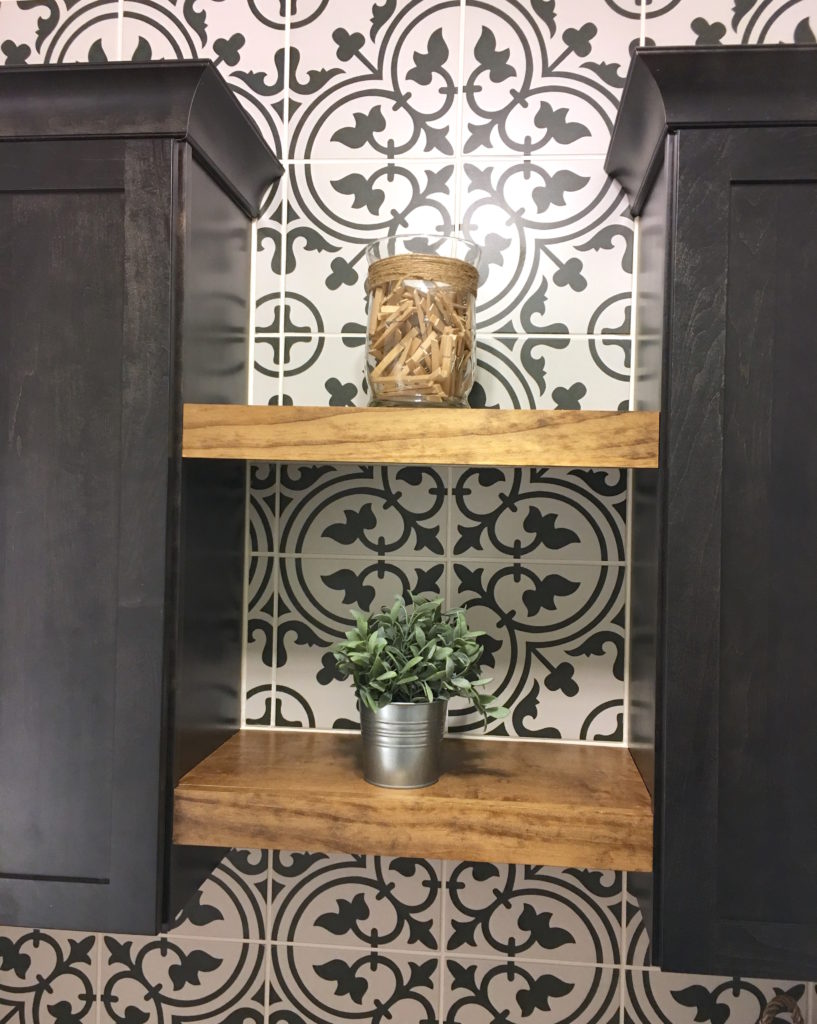
In previous posts, we shared how we installed the cabinets and countertop supports, and how we made the floating shelves. Between then and now, we have painted the room white, tiled and grouted, added the cabinet crown moulding, and installed our countertop.
Tile
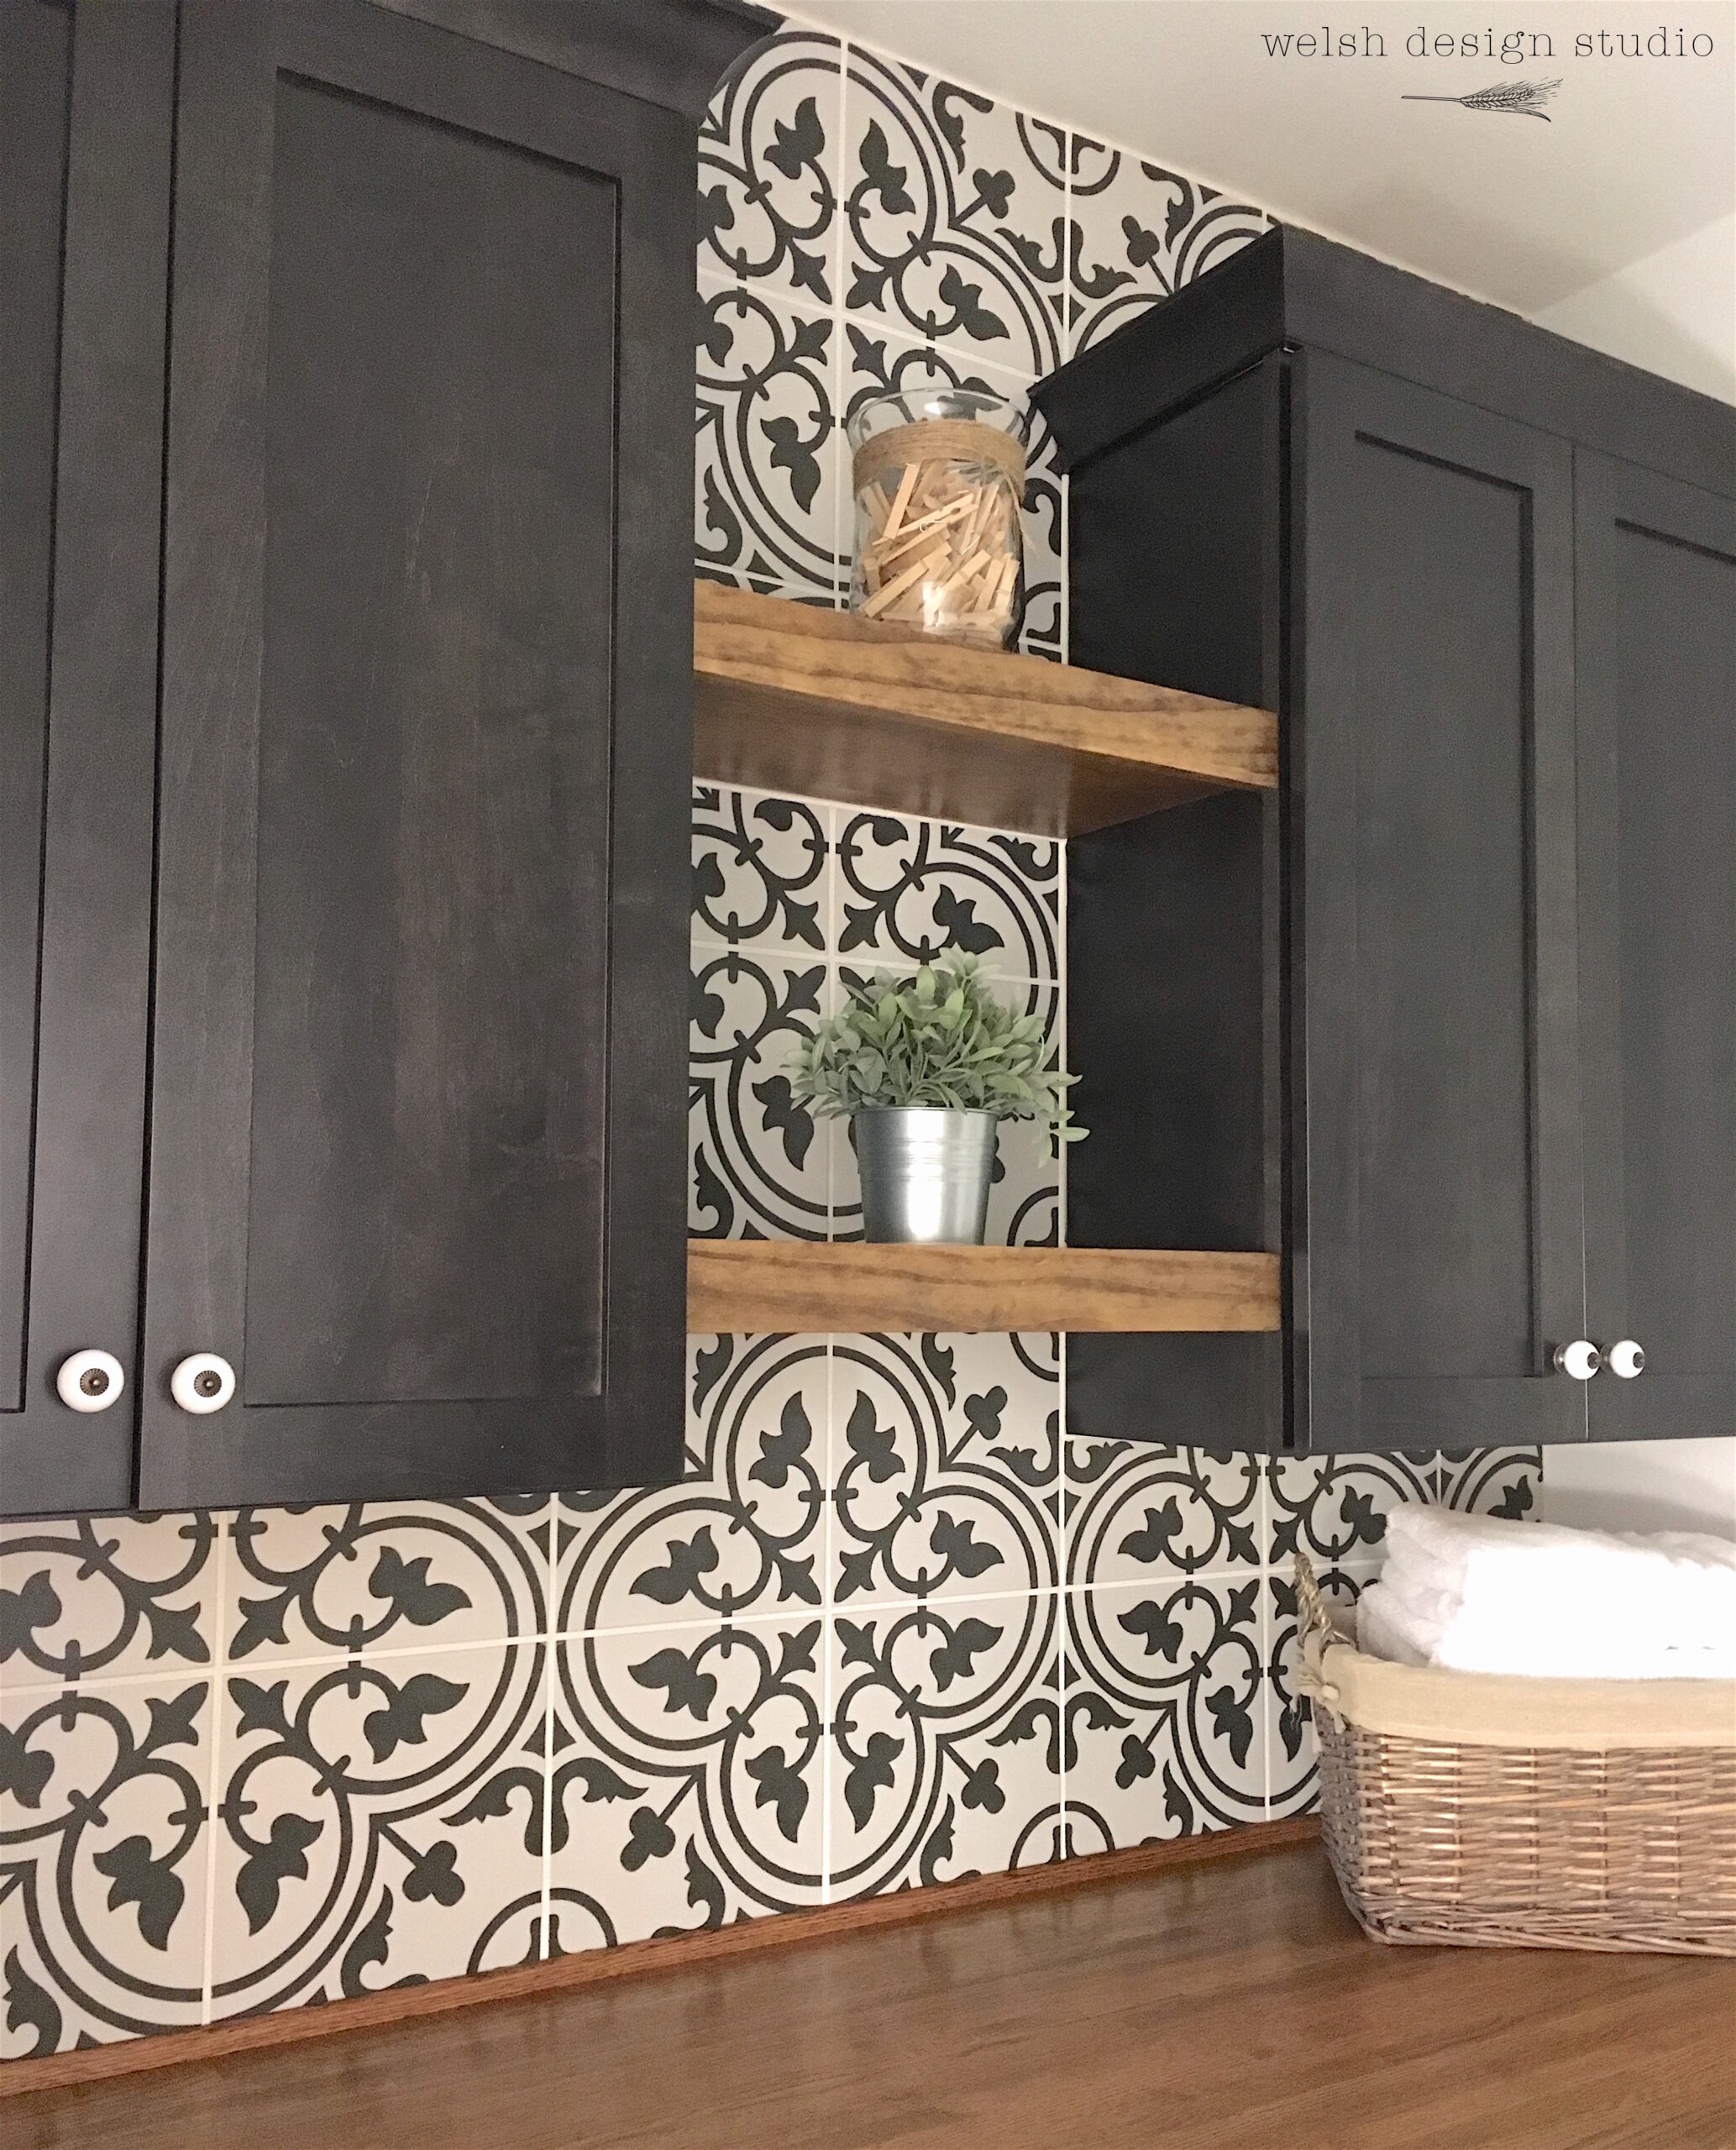
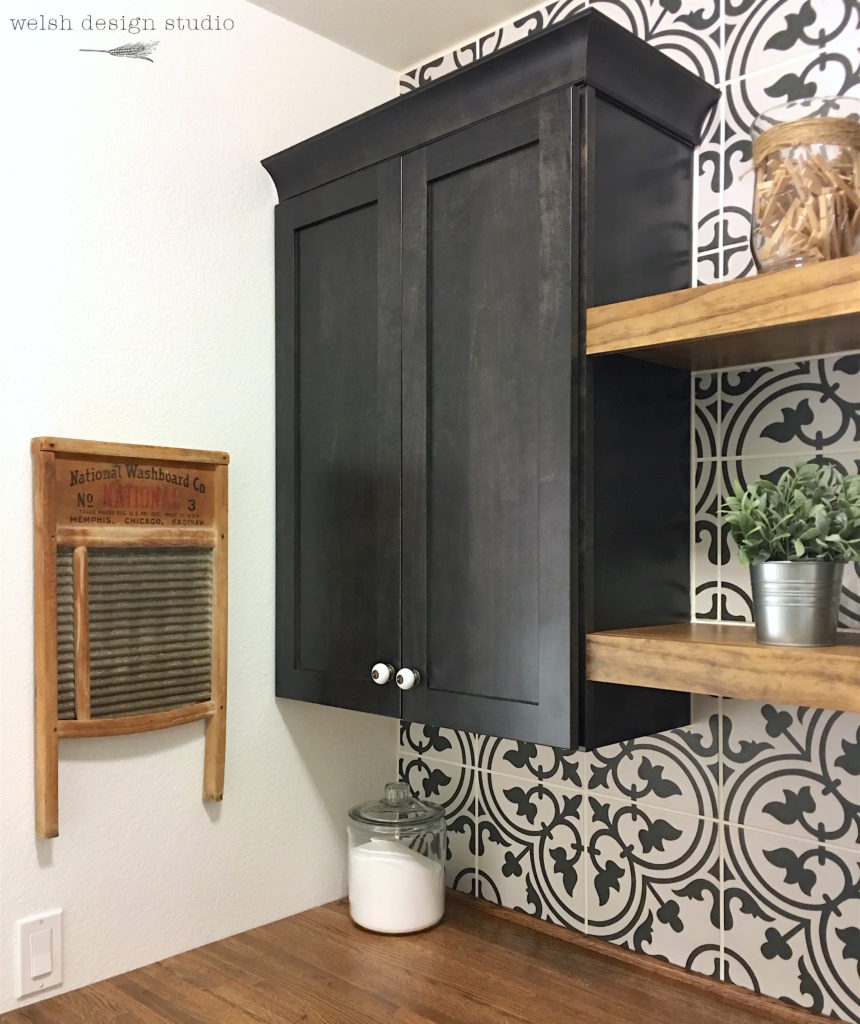
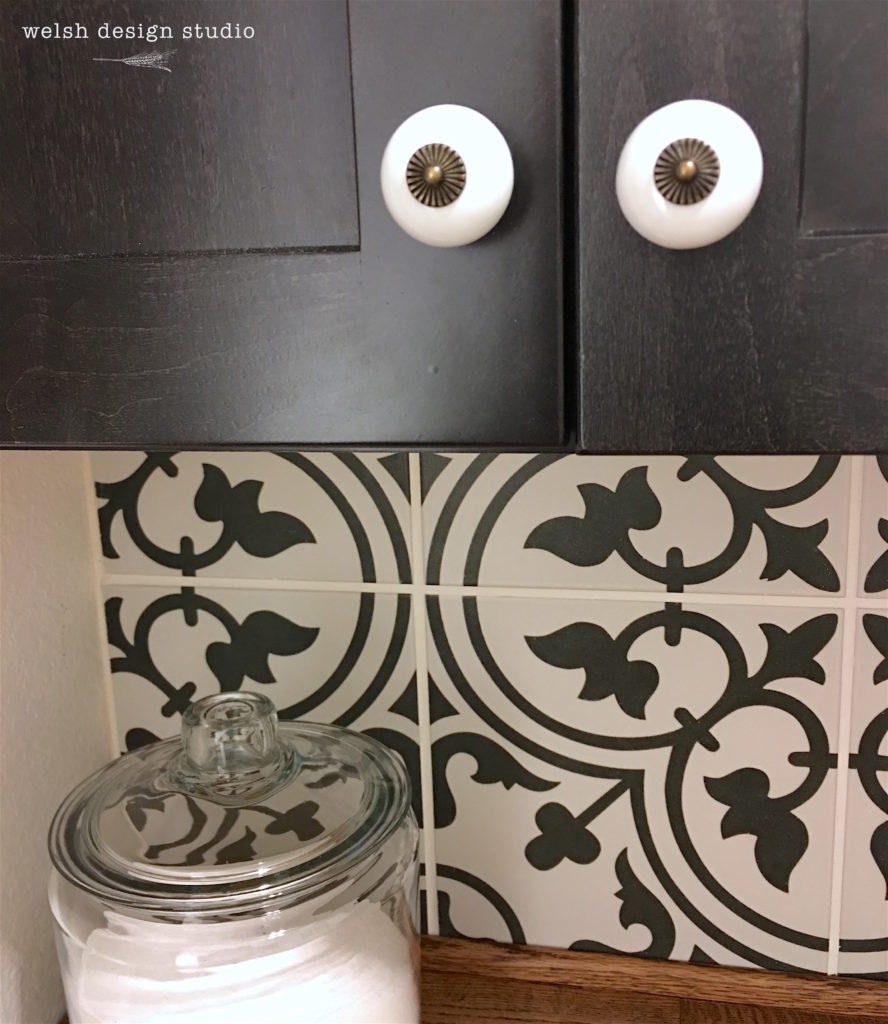
I’m not gonna lie…I despise tile work. It’s just so messy! Floor tile is a little easier, but reaching over the washer/dryer, and over the cabinets to install tile and grout was no joke! I had sore muscles that I didn’t even know were there! We chose the Merola Arte White tile from Home Depot, and it is a really beautiful tile!
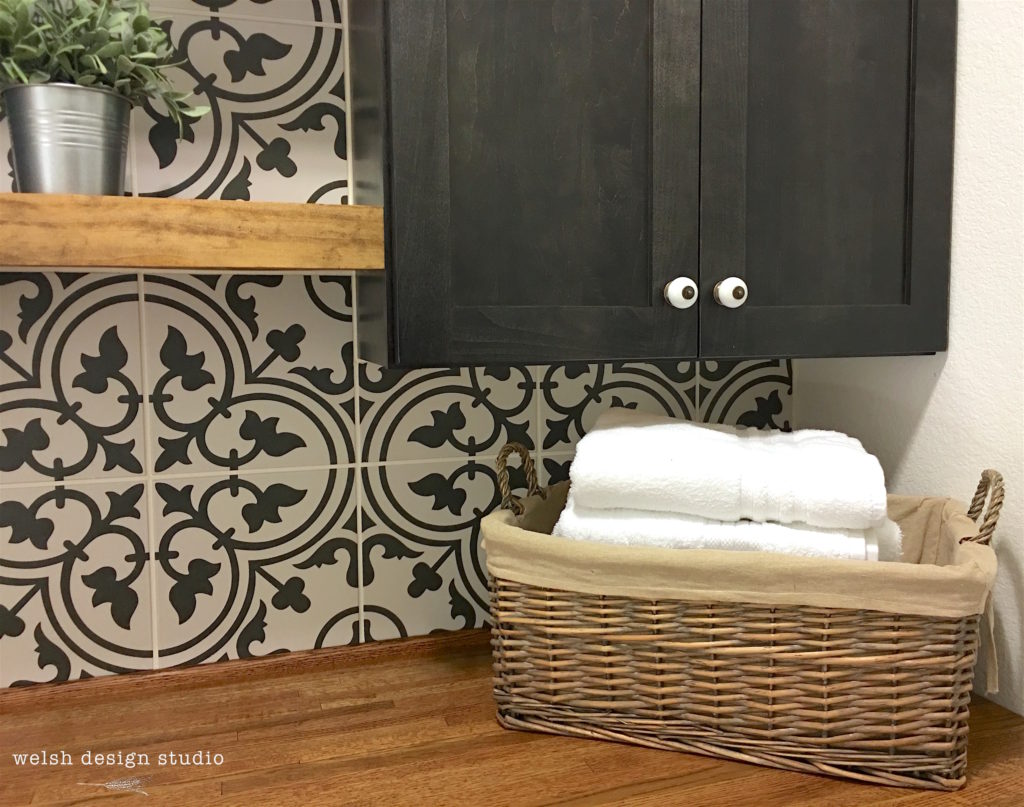
Cabinets & Knobs
We bought our cabinets from Lowe’s. Here are the details:
Manufacturer: Schuler
Door Style: Harper
Wood Type: Maple
Stain: Maple Onyx
The cabinets are 27″ wide by 12″ deep by 36″ tall, just to give you an idea of the size.
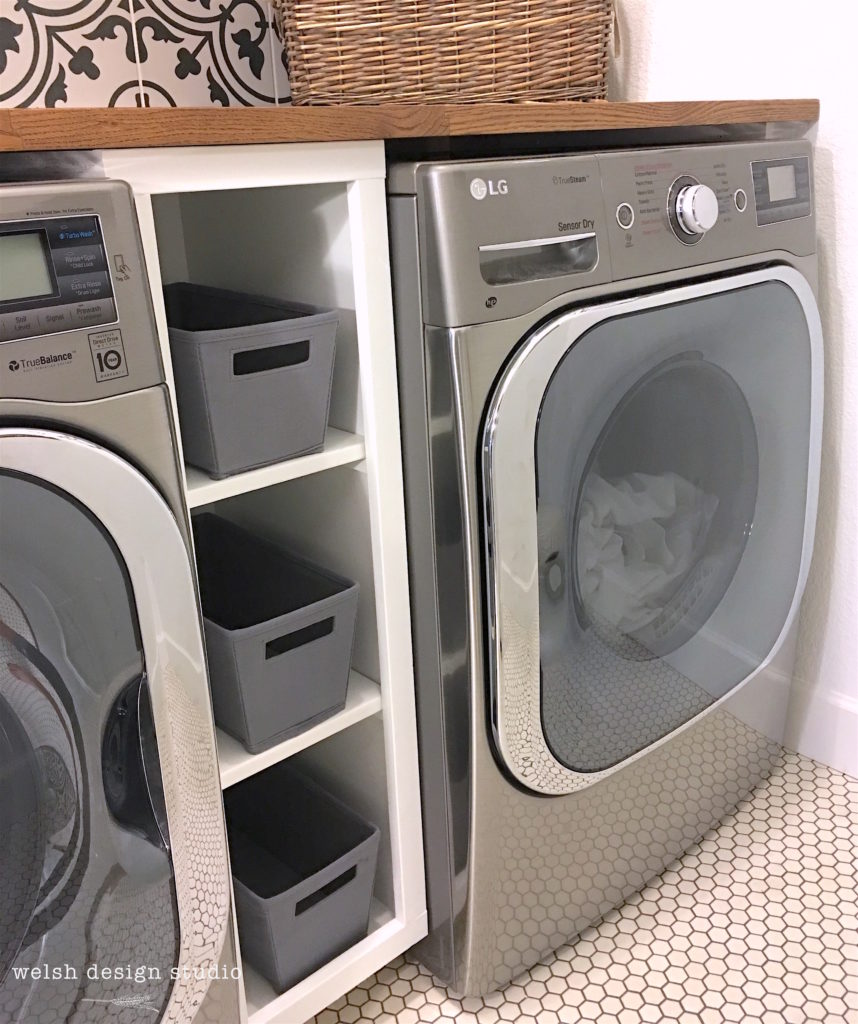
We built a cabinet to place between the washer and dryer for some extra storage, and also to provide additional support to our butcher block countertop. Speaking of our countertop, we installed the supports for the countertop back in mid-July. You can read about it here.
The countertop itself was custom-ordered from a local woodworking shop. We stained it using Minwax Stain in Provincial (the same stain we used for our floating shelves) and followed that with a couple of coats of Minwax Polycrylic in Matte. It came out so beautiful!
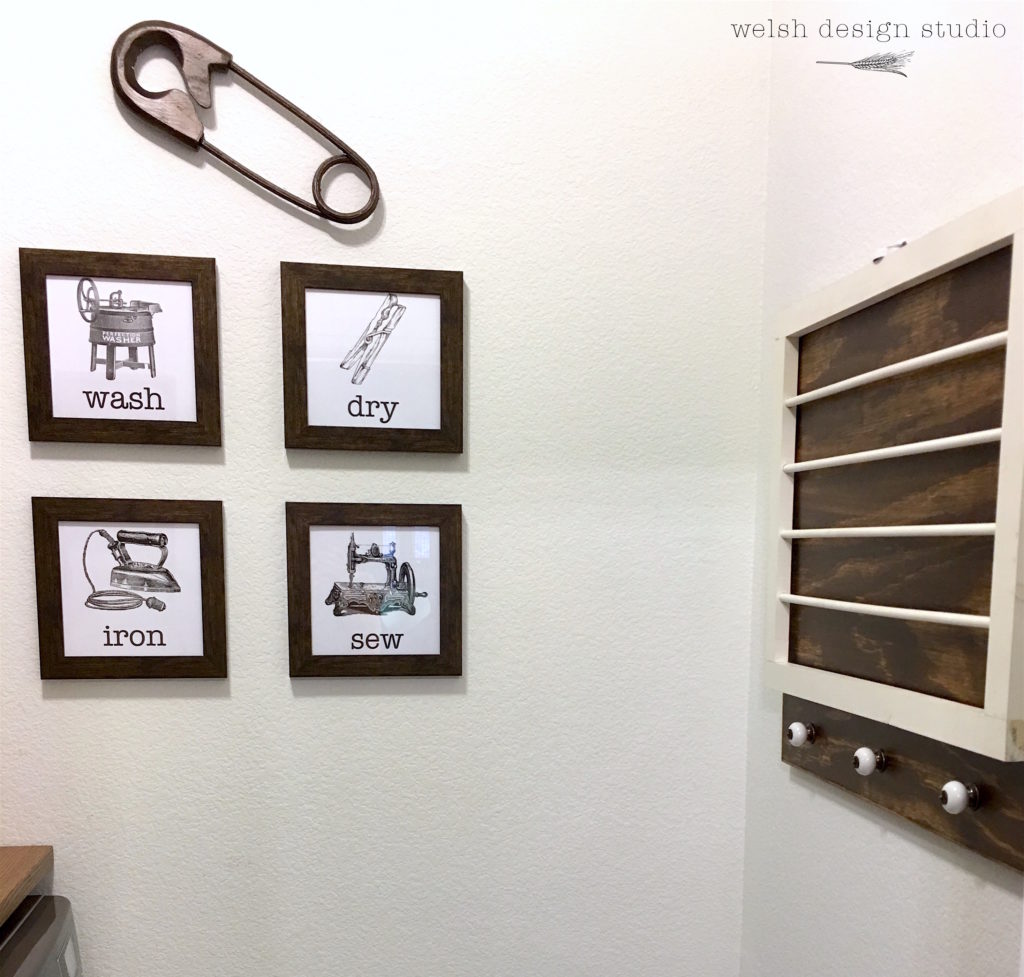
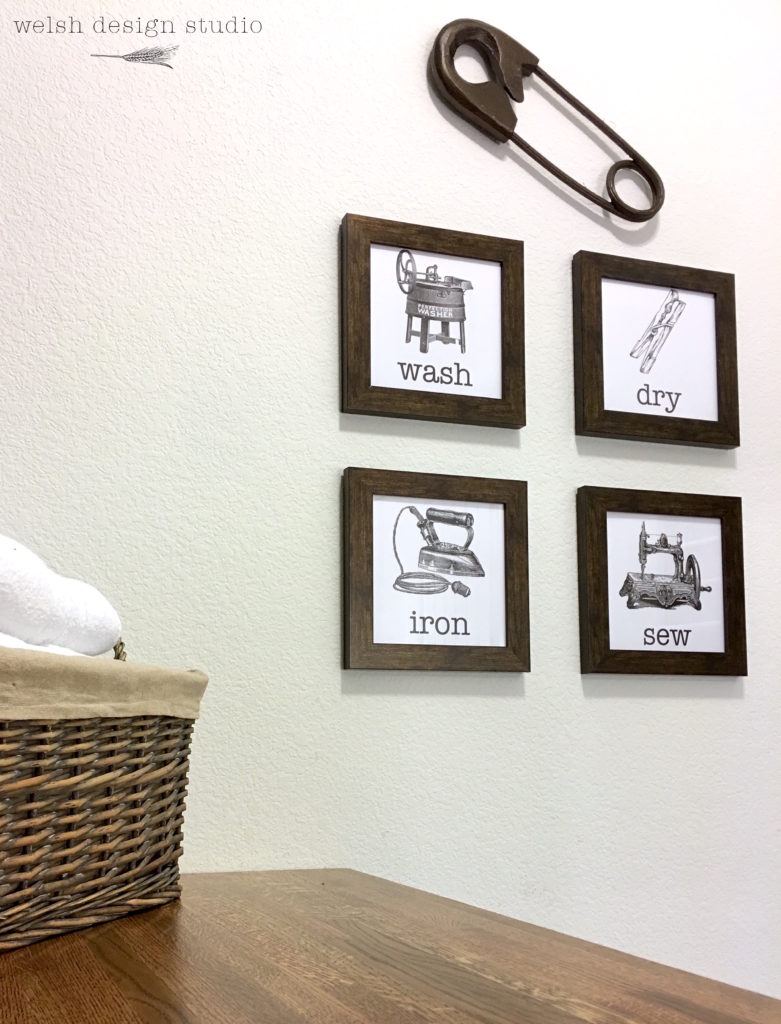
Laundry Printables
Remember these cute vintage laundry printables I shared a while back? Now you can either print them yourself, or buy them already framed from our shop. I just love them in this room!
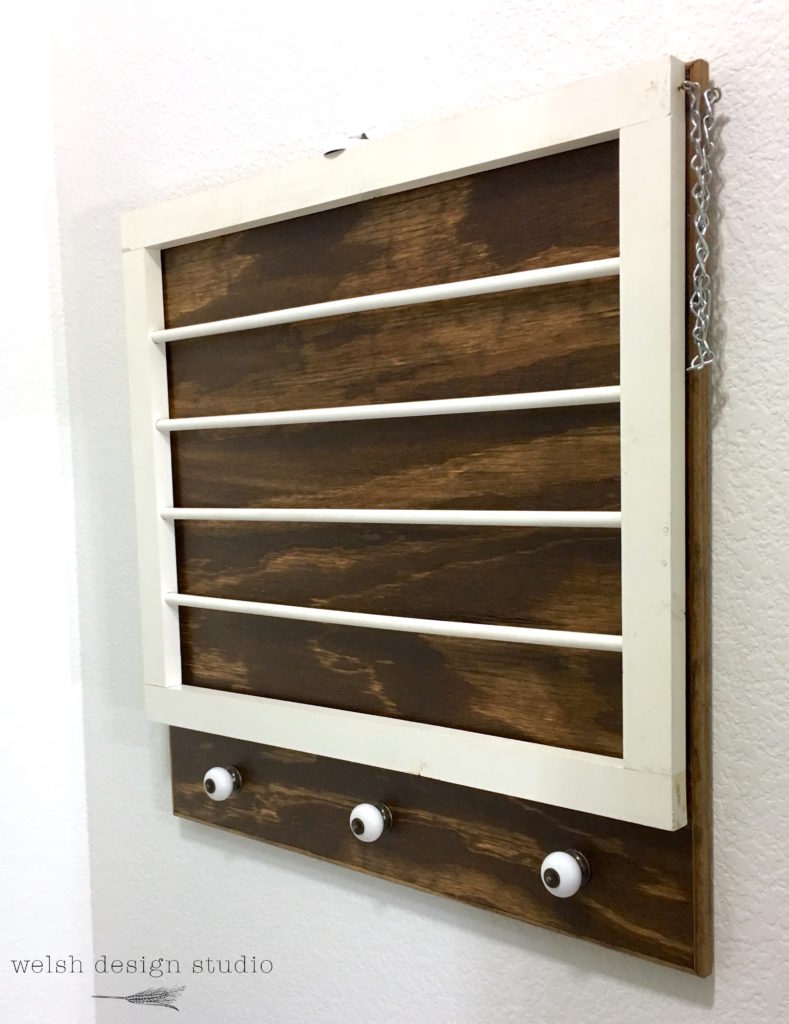
Drying Rack
This drying rack has been with us for several years. We made it following some directions from Centsational Style. Ours was originally a teal and white color, so we updated it by replacing the back board with a new stained piece, and installing the same knobs that we used on our laundry cabinets.
I can’t tell you how great it feels to finish up this laundry room makeover! The room turned out beautifully, and it such a change from what it looked like before we started. Laundry is so much more pleasant in a room that isn’t cluttered and lacks storage. OK, no, that’s a lie…laundry is never pleasant! 🙂
Melissa Welsh is an Interior Designer and founder of Welsh Design Studio. Her passion is empowering homeowners with the knowledge and skills to tackle home decorating and DIY home improvement projects on their own, and live in a home they love!
I absolutely love the counter above the washer and dryer. And that drying rack is such a clever idea! We recently painted our laundry room, and this post gives me ideas for more!
Hi Melissa,
Oh my! Your laundry room transformation is the best! The tile is beautiful, and worth all of your hard work. Love the shelving in between the washer & dryer too. The whole room is well planned as well as pretty. Well done!
Catherine
Wow great laundry room! It makes the job so much easier doing the endless task in a nice new room that you want to be in. Thanks for sharing your makeover! Stopped by from Brag about it link party:)
Wow, it is beautiful. I love the shelves and the cabinets. The pictures and large safety pin put the icing on the cake. Thanks for the inspiration, I’ve been fed up with my laundry room for awhile too. Thanks for sharing on Sunday’s Best.
This makeover is just gorgeous. We just finish our kitchen and our laundry room makeover is going to wait until Spring. You did a wonderful job, its gorgeous. Pinning.
I LOVE your newly styled laundry room — it’s gorgeous! Be sure to stop by The Creative Corner Link Up Party this week — I am choosing your makeover as a feature!
Gorgeous! I have a laundry room that looks like your “before” room. Actually mine is worse:) That butcher block top and dark cabinets look so great together! Love all the decorative touches, too. Thanks for sharing at Vintage Charm! Pinned!
xo Kathleen|Our Hopeful Home
Thanks Kathleen! Adding the countertops and cabinets were the best part (for us) of the makeover because it made the laundry room so much more functional!
Gorgeous transformation! I’ve always planned to do a laundry room makeover {I have an entire pinterest board dedicated to it} but never got around to it haha!!
Great Job! Love the old Scrubbing Board! I have my Mother’s and been thinking about putting it in our Laundry Room. Where did you get the Big Safety Pin? I have been looking for one but can’t find it anywhere. 🙁
Hi Peggie! That safety pin was a random buy from HomeGoods about two years ago, and I spray-painted it the bronze color. I wish it was still available!
Thanks for asking! I’ve got another post that shares how we installed the floating shelves. If you have any more questions after that, let me know and I’ll be happy to answer them. Here’s the post: https://welshdesignstudio.com/diy-floating-shelves-laundry-room/
I love your laundry room, and in am taking inspiration from it. Can you tell me how you hid the water hookups? It looks like you pulled the front cover off in one of the photos, but I don’t see them in any of the final pics.
So glad our laundry room is inspiring your design! For the water hookups, we just removed the plastic trim insert, and we placed our countertop at a height such that it would just cover the top of the “hole” for the water hookups. We didn’t attach our countertop permanently so that if there was ever a water issue, we could yank the countertop forward and get to the water shut off valves. The water hookups are still there, but they are just underneath the top of the countertop.
Hello! Great laundry room!! We are planning a similar project. I’m finding that I need a counter depth of close to 3′, and I keep wondering about difficulties with reaching into the cabinets, which will also have a 12″ depth like yours. Do you have any issues with this? I’m considering bumping out the wall cabinets somehow so they would be more accessible. Any thoughts on this? Thanks in advance for any input!
Hi Beth! With our laundry countertops at around 34″ deep, we didn’t have any trouble reaching the first two shelves of our cabinets, but I needed a step stool to reach the top shelves. If your cabinets will be surrounded by walls on each side, you could certainly build them out with some framing behind. You would probably also need to put a thin 1/4″ panel (painted or stained to match the cabinets) on the underside of the cabinets and framing to create a seamless look. Alternatively, you could see if the cabinet company makes deeper wall cabinets (most are 12″, but you may be able to special order some 16″ deep cabinets). Good luck with your project!
What a gorgeous makeover!! Thank you for your guide and tips on “how to”! Would you mind sharing how you accomplished adding your crown molding or any tips for you have for those finishing touches on the cabinets?
To install the crown moulding, we first installed wood blocks at the tops of the cabinets so that we had a surface to nail into. There is a great tutorial from Lowe’s that lays out exactly the steps we follow for installing crown on cabinets. Because our laundry cabinets were stained, we used a wood putty to fill the nail holes and any noticeable gaps in the crown moulding. Many times you’ll get touch up kits with your cabinets that will have fill sticks or wax that you can use to fill nail holes. If not, we often use Minwax Wood Putty in a closely matching color (available from Home Depot or Lowe’s or your local hardware store). We also like to use this tool for cutting our crown moulding. Hope that helps!
The top of the countertop just covers the box where the water faucets are housed. We didn’t secure the countertop to anything so that, in the event of a water issue, we could just yank the countertop forward and get to the faucets. We’ve also installed countertops like this where we just did a small cutout in the countertop for the faucets. Thanks for your question!
I have searched everywhere for inspiration ideas to redo my laundry room. Your set up is by far the best. Do you mind sharing how much you paid for your cabinets? With covid Lowes is not doing consultations on custom cabinets. I am trying to budget out cost.


I absolutely love the counter above the washer and dryer. And that drying rack is such a clever idea! We recently painted our laundry room, and this post gives me ideas for more!
Thanks Kristin! That countertop has made life so much easier!
Hi Melissa,
Oh my! Your laundry room transformation is the best! The tile is beautiful, and worth all of your hard work. Love the shelving in between the washer & dryer too. The whole room is well planned as well as pretty. Well done!
Catherine
Thanks so much, Catherine! The tile is my favorite part, even though it was (by far) the hardest part! 🙂
Beautiful! Love everything about it!
Thank you! It’s a nice change for us.
Gorgeous, so happy for you! Thanks so much for sharing on craft schooling Sunday, great to reconnect!
Thanks! It’s great to connect up again through your link party. Thanks for hosting!
I am absolutely crazy about this! I would never want to leave this room!! The antique washboard on the wall is such a sweet and perfect touch. 🙂
Thanks Wendy! We are definitely enjoying the new and improved laundry room.
Looks great! 🙂
I would love for you to share this with my Facebook Group for recipes, crafts, tips, and tricks: https://www.facebook.com/groups/pluckyrecipescraftstips/
Thanks for joining Cooking and Crafting with J & J!
Thanks! I shared it with your Facebook group.
I know this is a few years old, but I Love that giant safety pin on your laundry room wall.
Can it (still) be purchased anywhere?
I don’t think so…I bought it at HomeGoods, and I haven’t seen one there since. 🙁
What a stunning laundry room. That tile is just so gorgeous. I love every choice of decor you made here. Very pretty!
Thank you so much, Mary! We are happy with the way it turned out.
What a beautiful Laundry Room! I absolutely love the tiles and the dark cabinets, even the hardware is gorgeous!
Thanks Deb! I always wanted to put patterned tiles someplace in the house. The laundry room ended up being the perfect place!
I love your laundry room. I wish mine were as large as yours seems to be. You have really thought of all of the details.
You know, it feels bigger than it is now that it’s all done. Maybe because it’s not as cluttered as it once was! 🙂
Source for the safety pin wall decor? Everything is adorable!
I bought the safety pin at HomeGoods about 2 years ago, and spray-painted it the bronze color. It was a good find!
Wow great laundry room! It makes the job so much easier doing the endless task in a nice new room that you want to be in. Thanks for sharing your makeover! Stopped by from Brag about it link party:)
Thanks! I totally agree with you!
Wow, it is beautiful. I love the shelves and the cabinets. The pictures and large safety pin put the icing on the cake. Thanks for the inspiration, I’ve been fed up with my laundry room for awhile too. Thanks for sharing on Sunday’s Best.
Thanks so much for stopping by, Rhonda!
This is a beautiful space. You have definitely given me some inspiration to get my laundry room finished!
So glad to hear! Thanks Karlie!
This makeover is just gorgeous. We just finish our kitchen and our laundry room makeover is going to wait until Spring. You did a wonderful job, its gorgeous. Pinning.
Thanks Leanna! Good luck with your laundry room makeover in the Spring! I love your website, by the way.
I LOVE your newly styled laundry room — it’s gorgeous! Be sure to stop by The Creative Corner Link Up Party this week — I am choosing your makeover as a feature!
Thank you so much for featuring our laundry room!
Gorgeous! I have a laundry room that looks like your “before” room. Actually mine is worse:) That butcher block top and dark cabinets look so great together! Love all the decorative touches, too. Thanks for sharing at Vintage Charm! Pinned!
xo Kathleen|Our Hopeful Home
Thanks Kathleen! Adding the countertops and cabinets were the best part (for us) of the makeover because it made the laundry room so much more functional!
Gorgeous transformation! I’ve always planned to do a laundry room makeover {I have an entire pinterest board dedicated to it} but never got around to it haha!!
Justine @ Charm City Ciemny’s
http://www.lifeasabaltimoregirl.blogspot.com
Thanks Justine! I have a gazillion projects on my list, but it’s always so hard to find the time! Good luck with your laundry makeover!
This turned out beautiful and I love all the little details! Pinning!
Thanks! Adding all the little details when the project is just about done is the best part. 🙂
Love your Laundry room especially the gorgeous tile wall!
Thank you!
The entire room is so beautiful Melissa – you did such good work! I’m featuring your stunning laundry at our link party this week 🙂 xx
Thank you so much! We are really happy with the finished product!
Love this update. The tile is perfect. Pinning. Thanks for sharing at our link party!
Thanks Stephanie! That tile was a real pain to install, but I love it.
Love this! We’re getting ready to do our laundry room makeover and I think you sold me on the black cabinets!!
Thank you! I am definitely sold on black cabinets now, too. Especially, in a nice bright room (which our laundry room is not, but it still works)!
Great Job! Love the old Scrubbing Board! I have my Mother’s and been thinking about putting it in our Laundry Room. Where did you get the Big Safety Pin? I have been looking for one but can’t find it anywhere. 🙁
Hi Peggie! That safety pin was a random buy from HomeGoods about two years ago, and I spray-painted it the bronze color. I wish it was still available!
Can you share how the shelves were installed? How are they supported?
Thanks for asking! I’ve got another post that shares how we installed the floating shelves. If you have any more questions after that, let me know and I’ll be happy to answer them. Here’s the post: https://welshdesignstudio.com/diy-floating-shelves-laundry-room/
I love your laundry room, and in am taking inspiration from it. Can you tell me how you hid the water hookups? It looks like you pulled the front cover off in one of the photos, but I don’t see them in any of the final pics.
So glad our laundry room is inspiring your design! For the water hookups, we just removed the plastic trim insert, and we placed our countertop at a height such that it would just cover the top of the “hole” for the water hookups. We didn’t attach our countertop permanently so that if there was ever a water issue, we could yank the countertop forward and get to the water shut off valves. The water hookups are still there, but they are just underneath the top of the countertop.
Beautiful makeover. Can you tell me where can I find the printable vintage laundry signs?
Here you go! https://welshdesignstudio.com/laundry-room-artwork-free-printables/
Hello! Great laundry room!! We are planning a similar project. I’m finding that I need a counter depth of close to 3′, and I keep wondering about difficulties with reaching into the cabinets, which will also have a 12″ depth like yours. Do you have any issues with this? I’m considering bumping out the wall cabinets somehow so they would be more accessible. Any thoughts on this? Thanks in advance for any input!
Hi Beth! With our laundry countertops at around 34″ deep, we didn’t have any trouble reaching the first two shelves of our cabinets, but I needed a step stool to reach the top shelves. If your cabinets will be surrounded by walls on each side, you could certainly build them out with some framing behind. You would probably also need to put a thin 1/4″ panel (painted or stained to match the cabinets) on the underside of the cabinets and framing to create a seamless look. Alternatively, you could see if the cabinet company makes deeper wall cabinets (most are 12″, but you may be able to special order some 16″ deep cabinets). Good luck with your project!
What a gorgeous makeover!! Thank you for your guide and tips on “how to”! Would you mind sharing how you accomplished adding your crown molding or any tips for you have for those finishing touches on the cabinets?
To install the crown moulding, we first installed wood blocks at the tops of the cabinets so that we had a surface to nail into. There is a great tutorial from Lowe’s that lays out exactly the steps we follow for installing crown on cabinets. Because our laundry cabinets were stained, we used a wood putty to fill the nail holes and any noticeable gaps in the crown moulding. Many times you’ll get touch up kits with your cabinets that will have fill sticks or wax that you can use to fill nail holes. If not, we often use Minwax Wood Putty in a closely matching color (available from Home Depot or Lowe’s or your local hardware store). We also like to use this tool for cutting our crown moulding. Hope that helps!
Super pretty! But, how did you hide the faucets where the Washer hoses attach?
The top of the countertop just covers the box where the water faucets are housed. We didn’t secure the countertop to anything so that, in the event of a water issue, we could just yank the countertop forward and get to the faucets. We’ve also installed countertops like this where we just did a small cutout in the countertop for the faucets. Thanks for your question!
I have searched everywhere for inspiration ideas to redo my laundry room. Your set up is by far the best. Do you mind sharing how much you paid for your cabinets? With covid Lowes is not doing consultations on custom cabinets. I am trying to budget out cost.
Thanks! I want to say we paid close to $500 for the two cabinets and crown moulding piece, but I no longer have the receipts. 🙂
I just love it! By any chance do you know how wide your whole wall is with the cabinets?
I don’t recall the exact dimensions, because we’ve since moved, but I think the cabinet wall was right around 6 feet wide
Can you tell me what color on the walls
The wall color is Sherwin Williams Extra White.
what kind of wood is the butcher block?
It was an unfinished birch countertop from Home Depot
How long are the shelves between your cabinets?
They were 24″ wide.
Hi! Did you just use 1/4 round molding for the trim along the back of the countertop? If so do remember what size?
We used a base shoe moulding, because we liked the slimmer profile, but a 1/4 would work great, too.
did you attach the molding trim to the countertop? since the countertop is not attached? Love the look.
Yep, that’s exactly what we did. We just pushed the trim piece up against the wall, and nailed it straight down into the countertop. Worked great!
Love your laundry room makeover! Absolutely gorgeous! I would love to know how you made the shelves between your washer & dryer!
How much room is there from the bottom of your cabinet to the countertop?