A little while ago, we installed a gorgeous plank ceiling for one of our clients. At the end of that project, we ended up with several scraps of tongue and groove plank wood to dispose of. Rather than tossing it all into a dumpster, we decided to create a small plank wall in our own home.
Here is a picture of that lovely plank ceiling. I have to say, I had major ceiling envy after we finished this project. I kept asking Andrew where in our house we could do a plank ceiling like this. Pretty sure I found the perfect place, by the way…
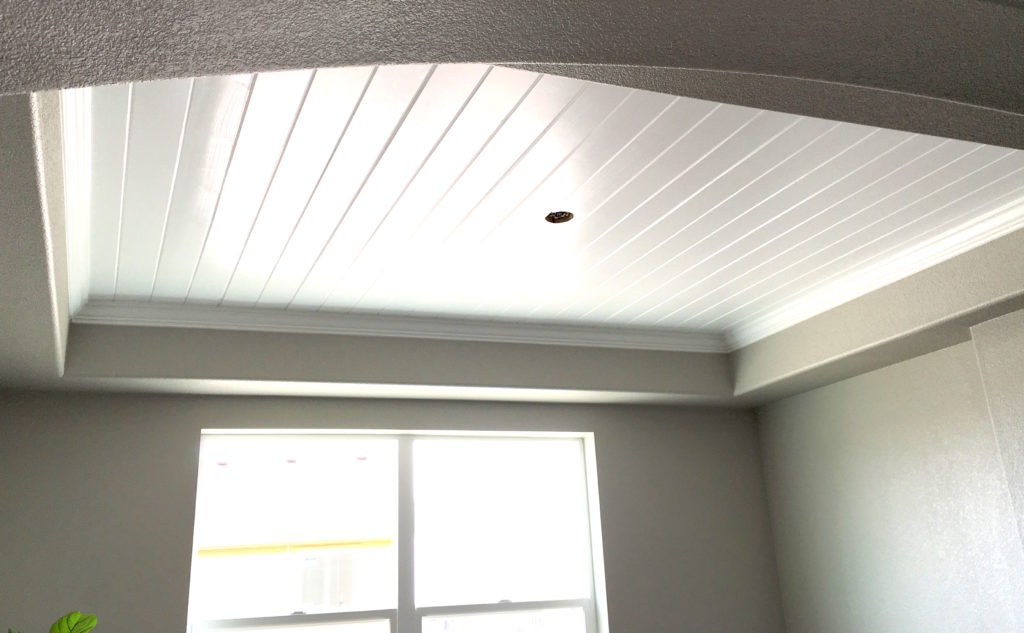
To make this ceiling (and our small plank wall), we used 1×6 primed finger joint tongue and groove boards from Home Depot. The great thing about these boards is that they are “clear”, which means there are no natural knots in the wood. They also happen to be straighter than the regular unprimed pine tongue and groove boards, which makes life a lot easier when you are installing large ceilings. The only downside is that they are a little more expensive. But, we happen think the extra expense is worth it for an easier installation.
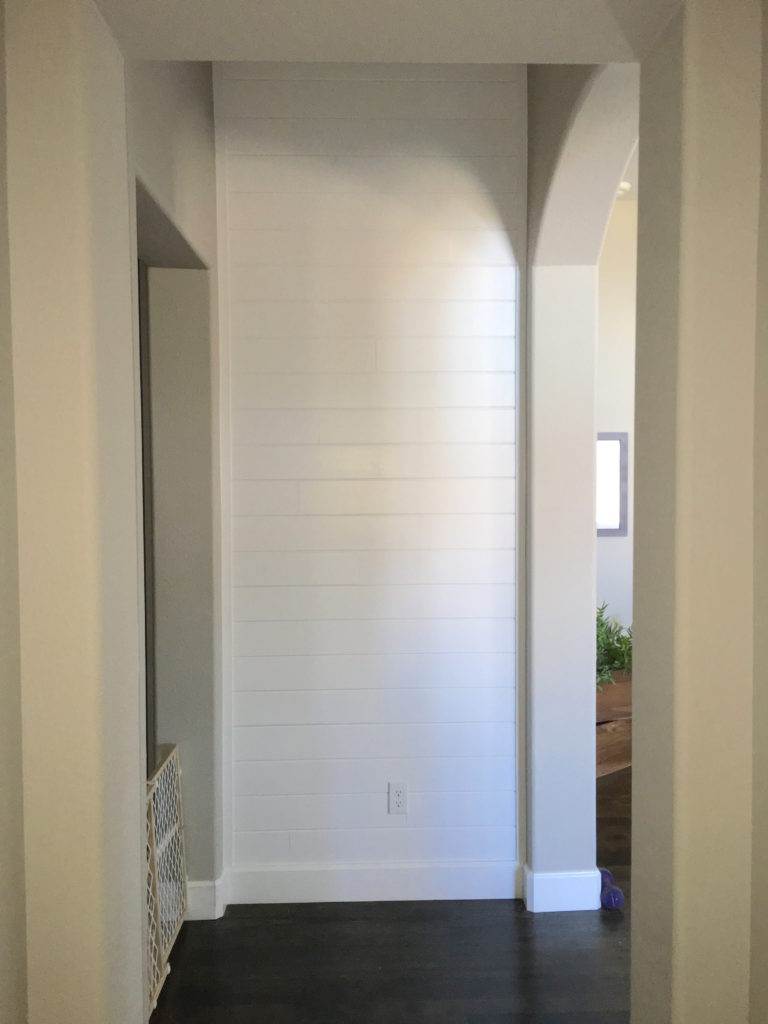
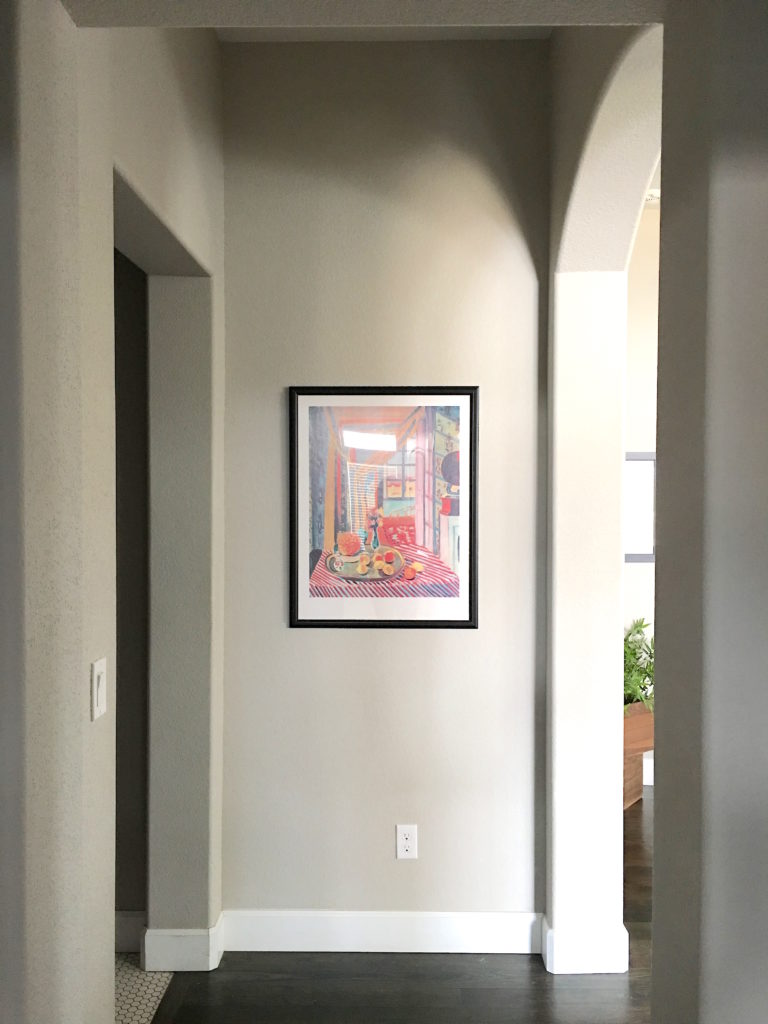
Before
Here is a picture of our little wall before we installed our leftover planks. I always think that walls like this are just screaming out for a little love – shiplap, reclaimed wood, anything! Because it’s framed in on all sides, it’s perfect for a decorative accent wall!
How to Install the Plank Wall
Installing a tongue and groove plank wall is pretty simple and straightforward. If you want to skip the tutorial, just scroll on down to the after pictures.
Step 1 – Prepare Your Wall
Because of the thickness of the planks, we think it’s best to remove the baseboards, and then reinstall them on top of the planks. It just gives a cleaner overall look in the end. A little extra work, but worth it.
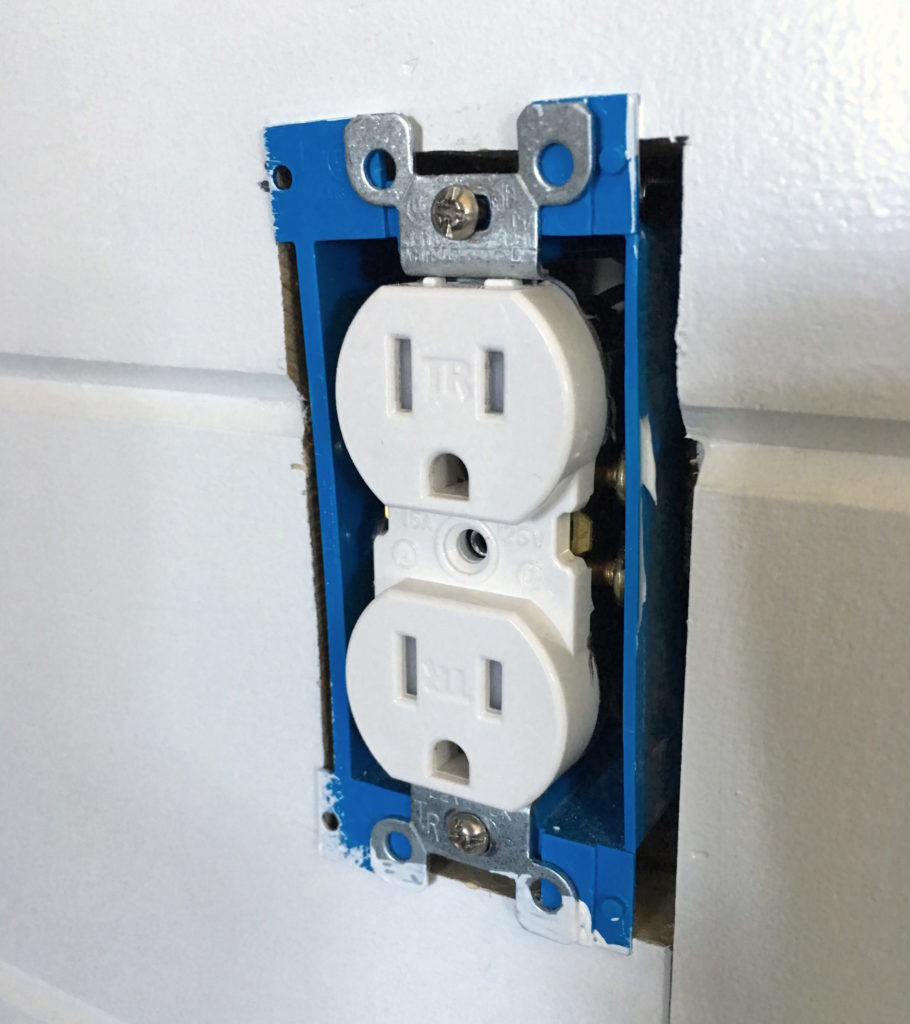
If you have electrical outlets or light switches to contend with, like we did, you’ll want to extend them out from the wall because the planks are 3/4 inch thick. The way to do this is to first turn off the power to that plug (use a plug tester to be sure!). Then, remove the faceplate and unscrew the outlet from the box. Once your planks are all installed, you can use a plastic electrical box extender to reinstall your plug, like this…
Finally, before installing, find your wall studs using a stud finder, and mark them. Tip: we like to use a long strip of painter’s tape so that we can see the stud location(s) as we move down the wall.
Step 2 – Install the Planks
We did a little math ahead of time and determined that our wall height was going to allow us to have full boards all the way to the bottom of the wall. So, in our case, we just started at the top. However, you might want to start at the bottom…I personally don’t think it makes a huge difference.
Install your first board, making sure it is nice and level (even if that means you’ll have a small gap at the top). It’s more important that the boards be level, because you can always install some trim at the end to cover up any gaps. Install the tongue and groove boards with the tongue facing in the direction you’ll be installing (in our case, with the tongue facing down).
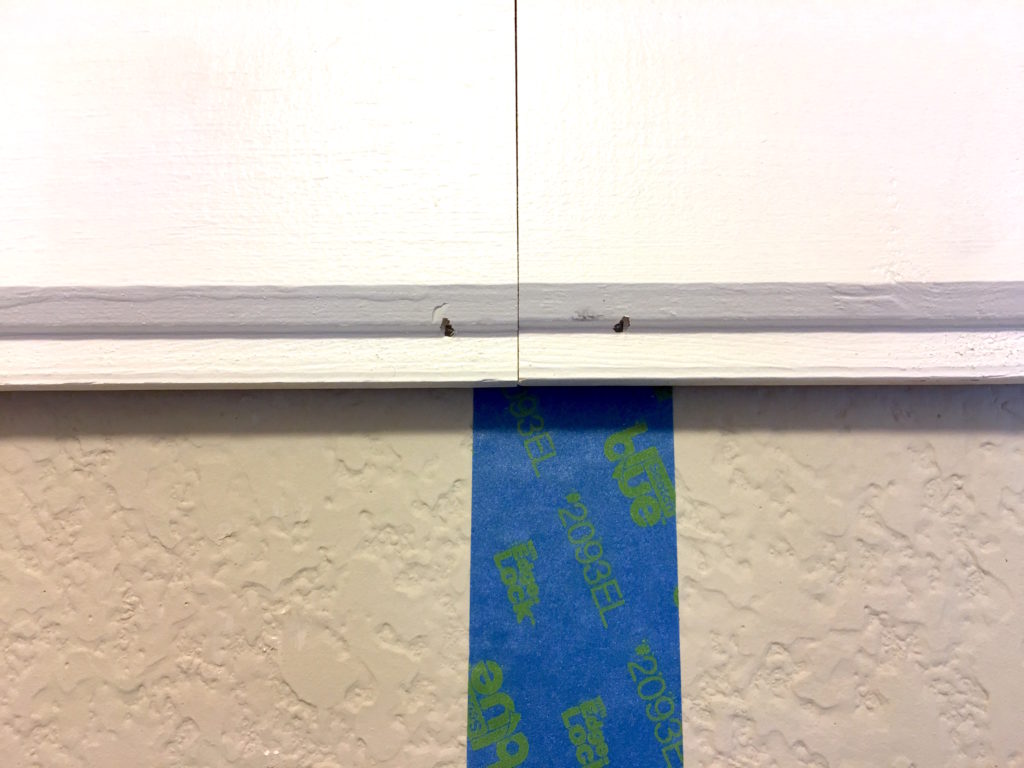
Use a nail gun to install the planks with the “blind nail” method. That just means that you nail through the tongue of each board (like in the picture below), rather than nailing into the face of each board. The nice thing about this method is that once you install the next board, your nails are hidden, This keeps you from having to fill a whole bunch of nail holes later on.
Keep working your way down, cutting out any holes for electrical or light switches. Since we used scrap pieces, we also made sure to stagger the seams in each row so that it looked nice and random.
Step 3 – Finish Up
You’ll most likely have to trim the width of last board you install. In fact, one trick we always use is to cut off the groove on the backside of the last board. We do this by setting our table saw to about 1/4 inch and running the groove of the board through. Makes installing that last board a breeze, rather than trying to get it to slide up over the tongue in a tight little space.
Next, reinstall your baseboard over your new plank wall.
Finally, install some trim pieces on the sides of the wall, and where the wall meets the ceiling. You can use any trim you like for this, but we chose to use a lattice trim because it’s nice and thin, and we like the clean simple look of it.
Step 4 – Prep and Paint
You’re almost there! Just fill any nail holes you had to make in the faces of the planks, your baseboard, and your trim pieces. Then caulk all the seams, all the places where your trim meets the walls/ceiling/baseboards, and the grooves of the boards. You don’t have to caulk the grooves, but I personally think it looks much cleaner if you do. Plus, it fills in any of your blind nail holes that are showing.
Once the caulk and nail fill are dry, do a light sanding of the nail holes, wipe clean with a tack cloth, and paint away!
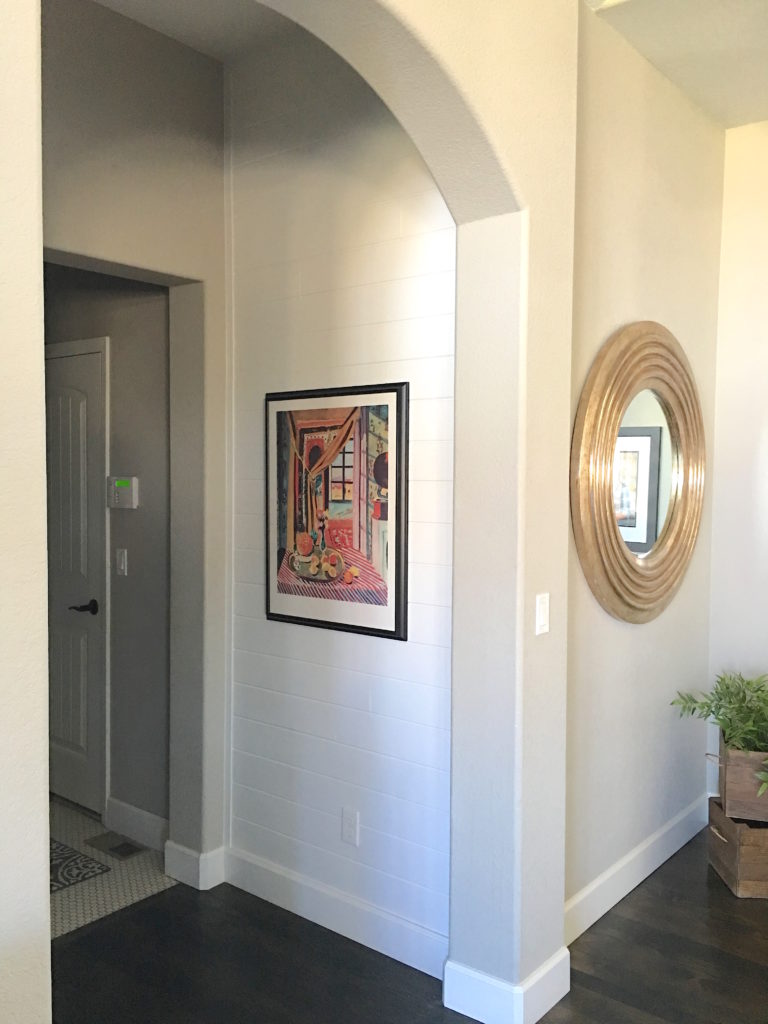
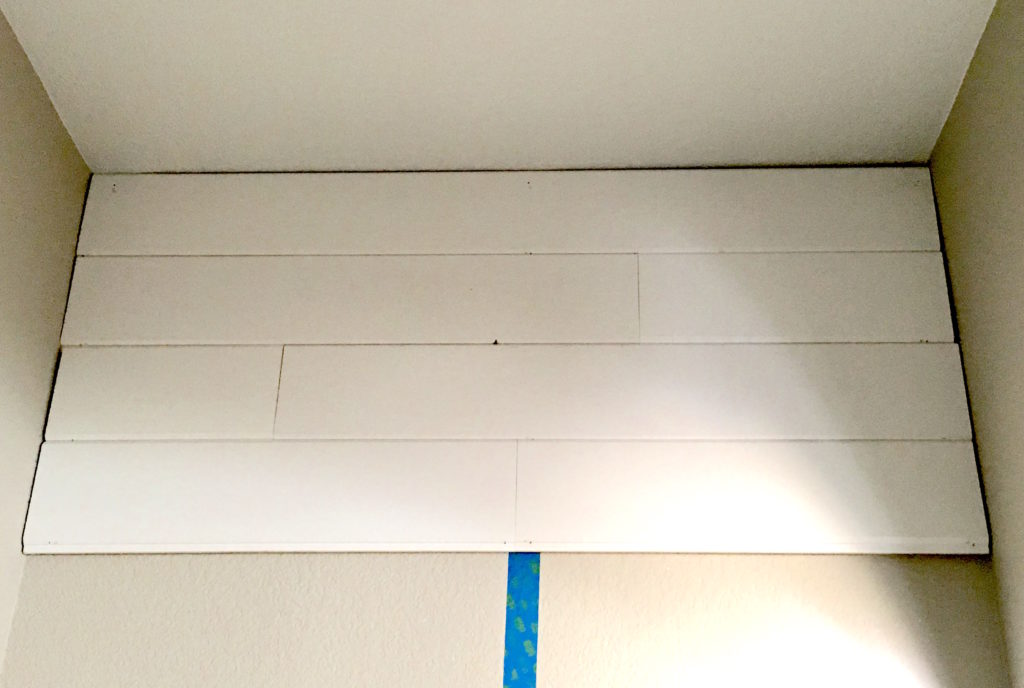
After
Here is our small plank wall made entirely from scrap wood pieces. The many seams aren’t even that noticeable! This was a fun, quick, and easy project that added a little character to an otherwise plain wall in the house. Those are my favorite kinds of projects!