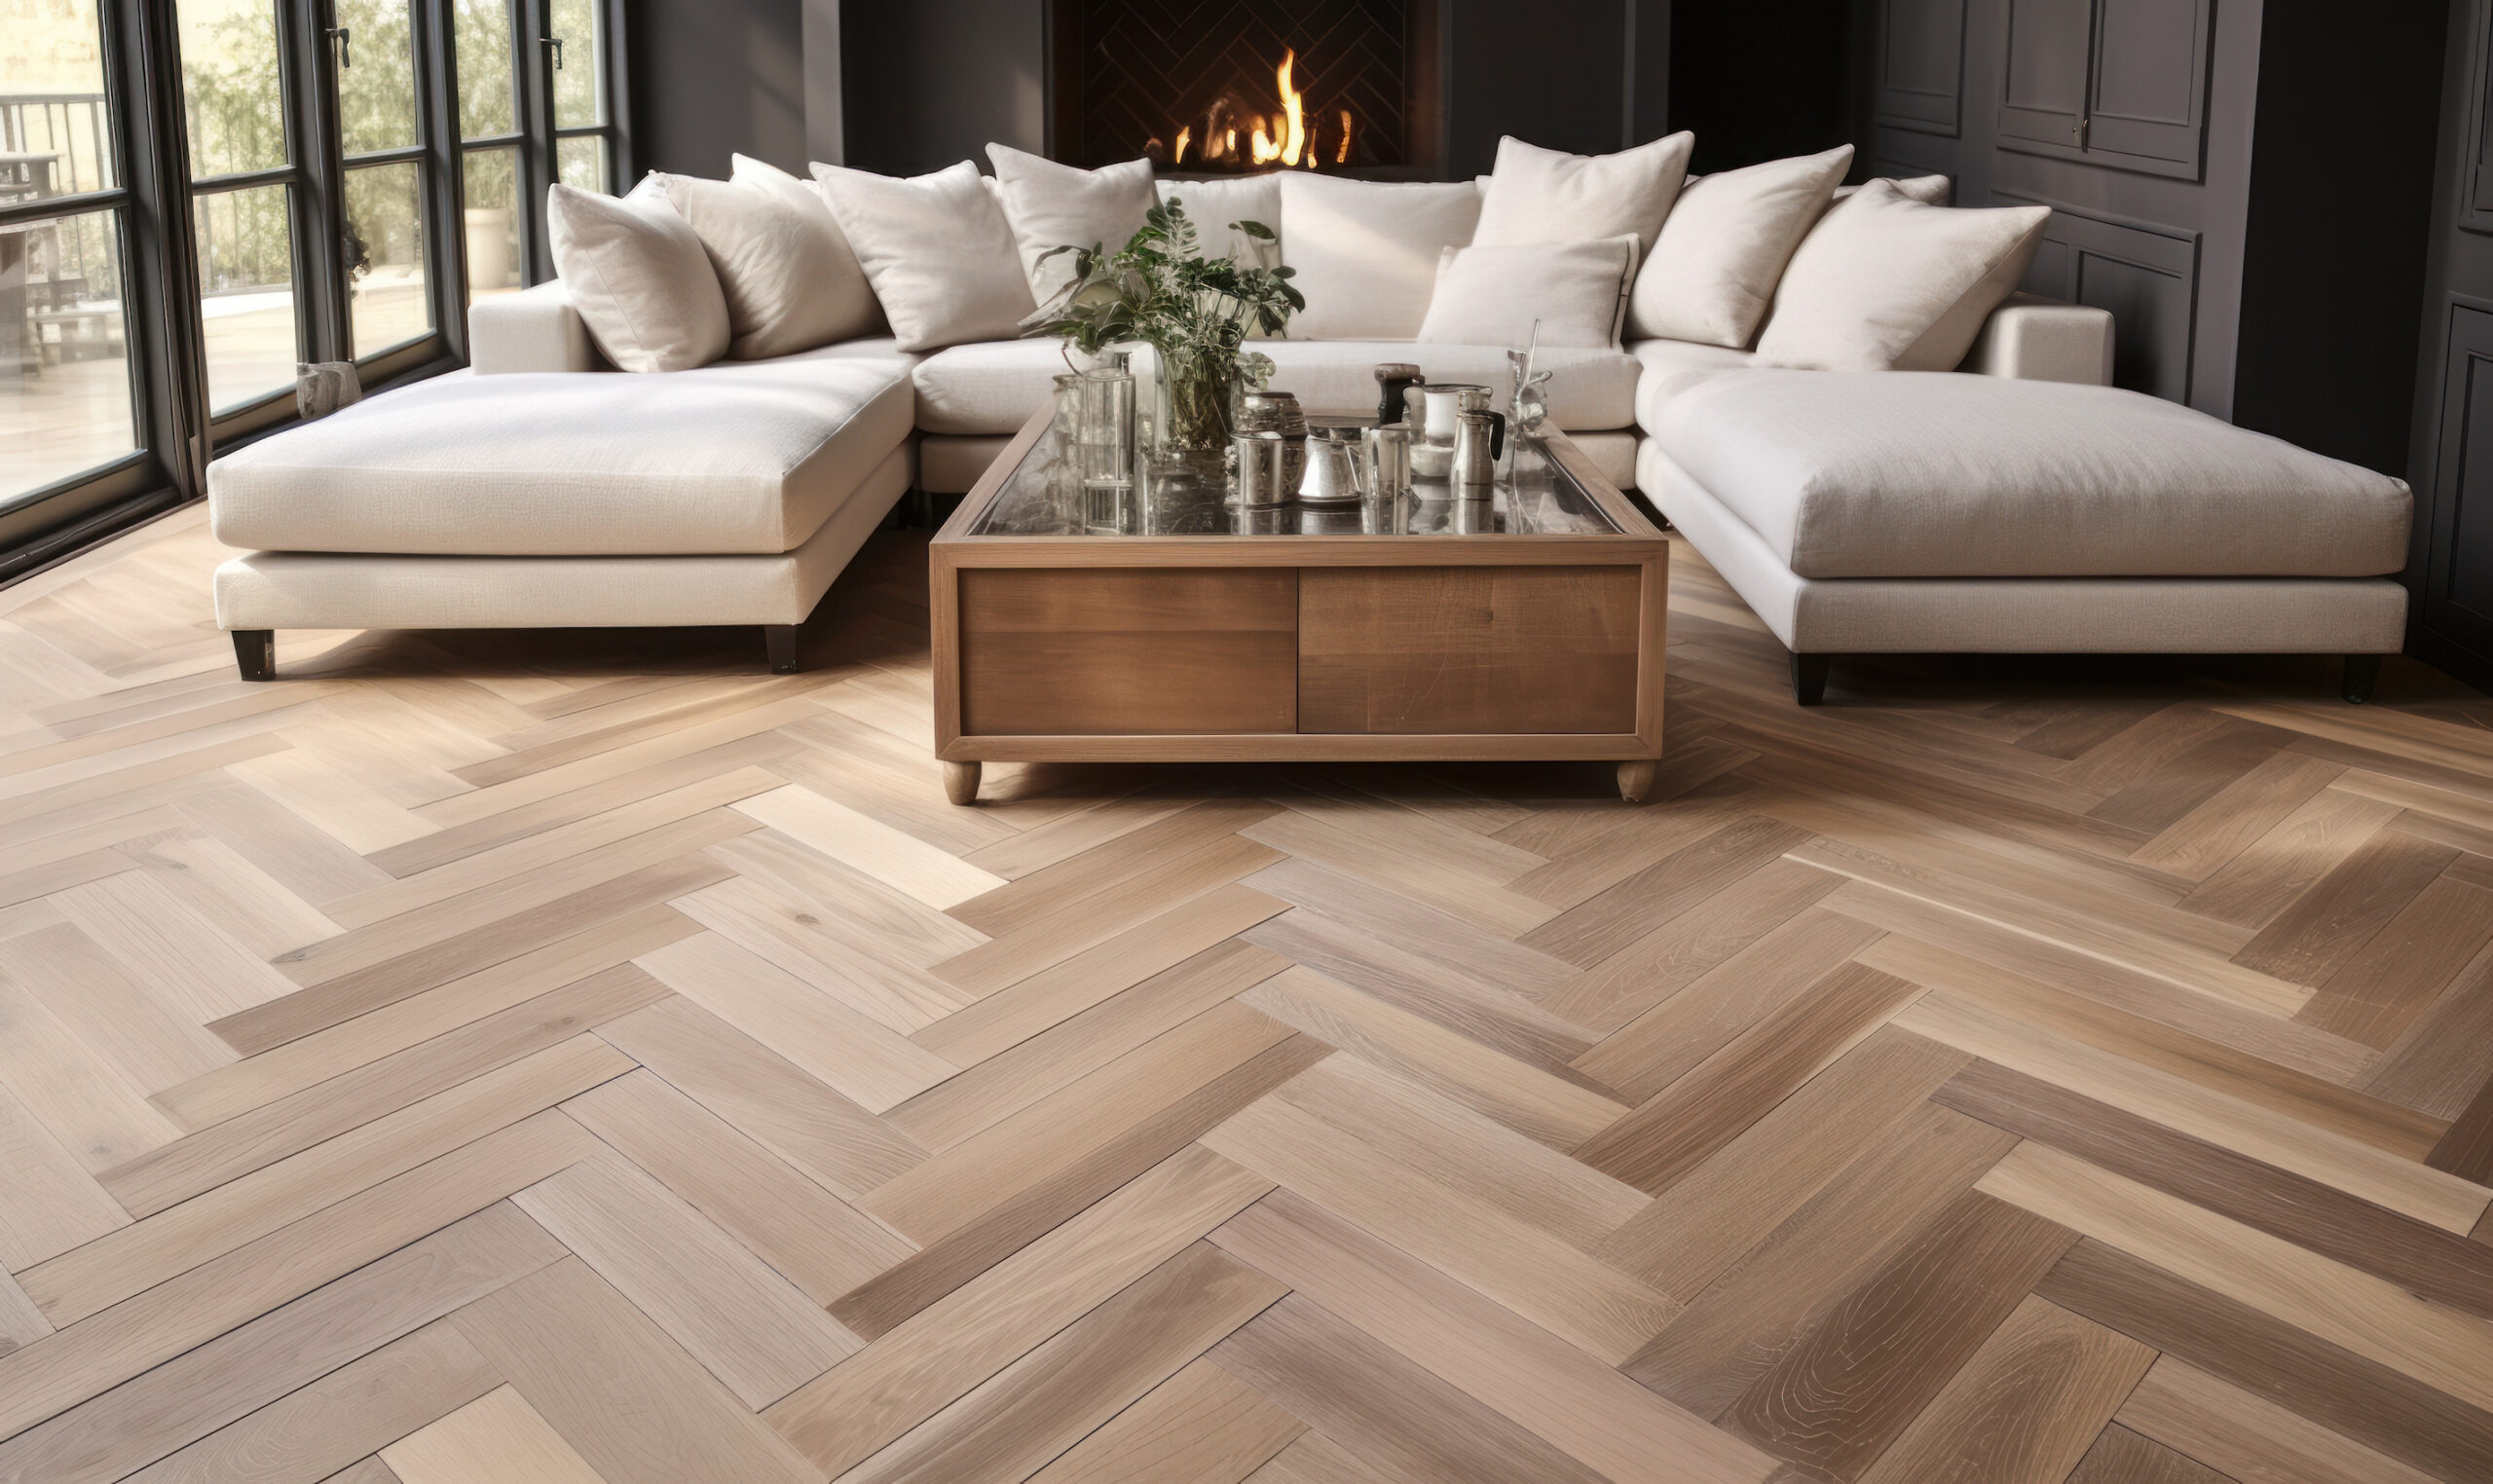
In recent years, the herringbone pattern has surged in popularity, blending a rich history with contemporary style in home design. This classic pattern creates a sophisticated look that can transform any space. Whether you’re installing a herringbone wood floor, laying a ceramic tile backsplash, or crafting a beautiful accent wall, understanding how to measure and install herringbone pieces will ensure that you end up with a beautiful result. In this blog post, I’ll guide you through the process of creating a wood herringbone pattern, ensuring you achieve the best results for your project.
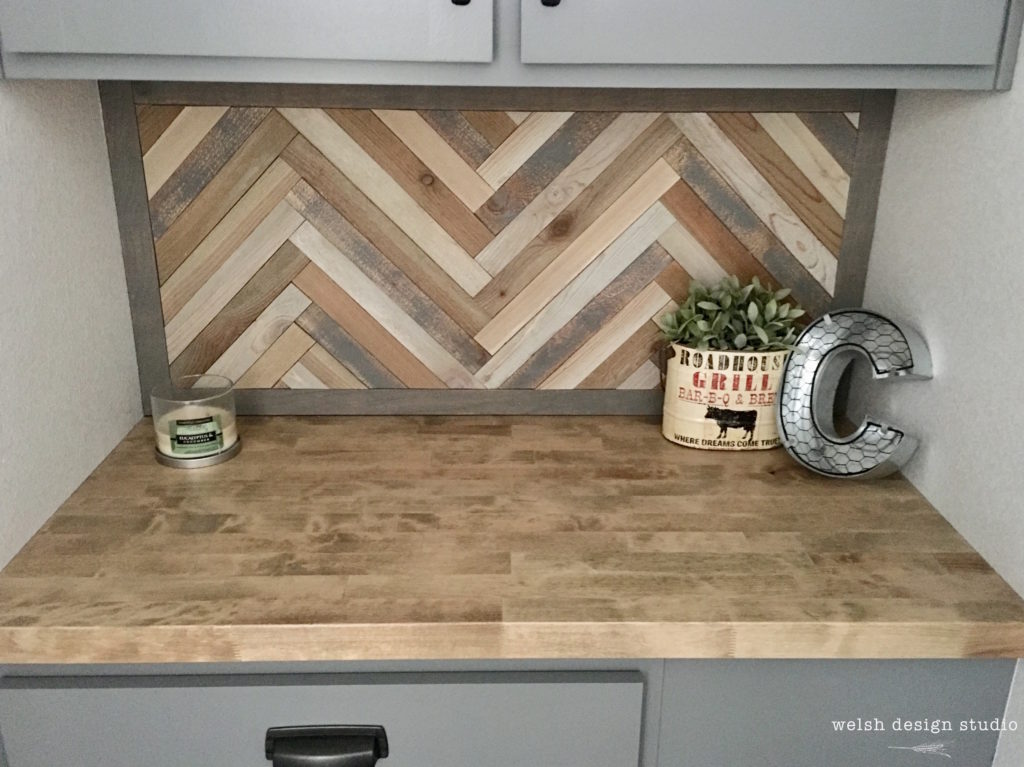
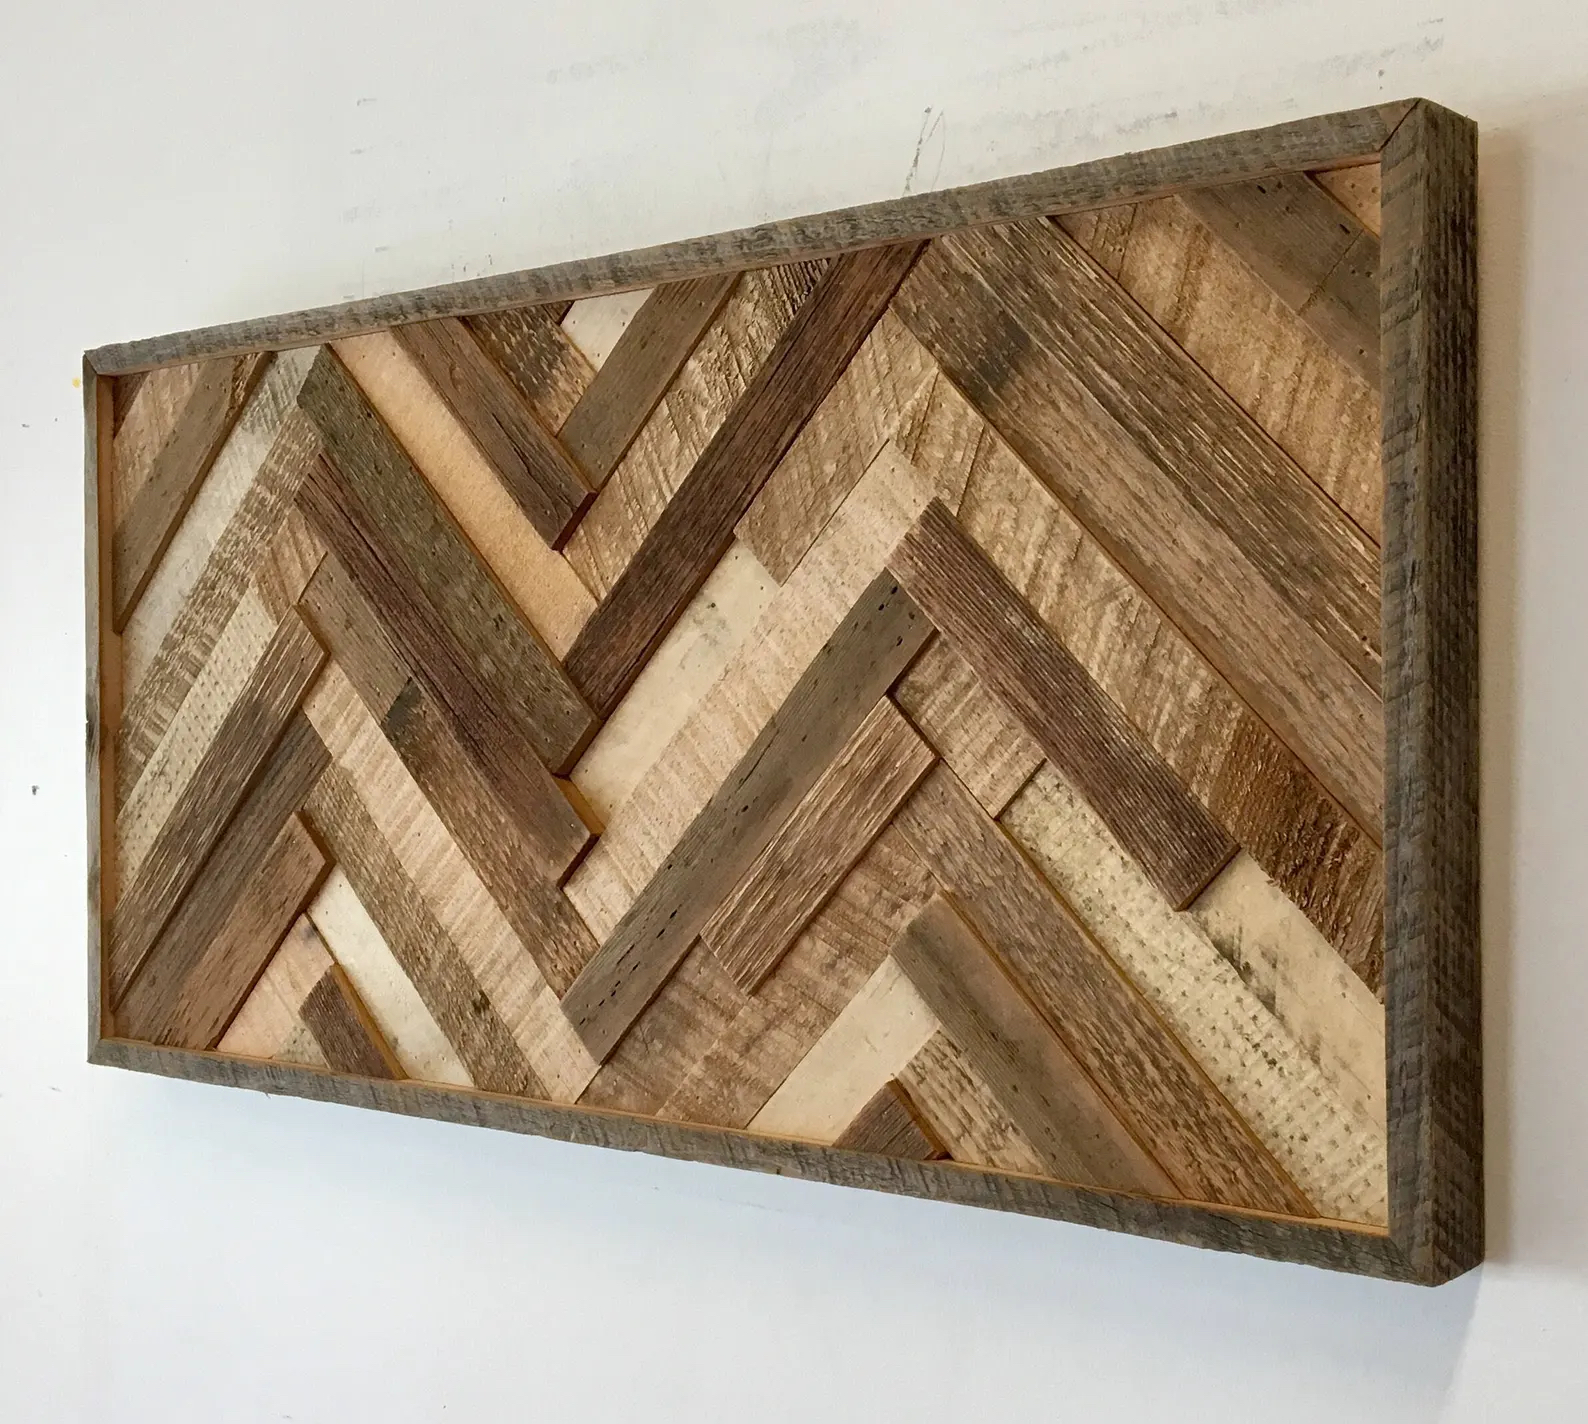
In a previous post I shared with you a mudroom we recently completed for a client that had a fabulous backsplash with a wood herringbone pattern. Once we made it, we fell in love with it, and thought it would make a great accent wall or unique wall decor piece. We’ll use this project as an example for this post, and then you can apply the same methods to any herringbone project.
If you think it’s too complicated, I’m here to assure you that it’s not. In fact, I’m going to break it down for you into 6 easy steps that you can do without a lot of fancy tools! I promise you can do this!
Materials
You can get all of these materials at your local hardware store or lumber yard, Home Depot or Lowe’s, or buy them online (links provided).
- 1/4 inch plywood (4’x4′ sheet) backer board, cut to desired size for wall art (you can have Home Depot or Lowe’s cut it for you)
- 1×2 common boards (6 ft lengths)
- Wood Glue
- Some small nails and hammer – 1″ long (or use can use a nail gun, which we highly recommend)
- 2 or more wood stain colors of your choice, and/or paint
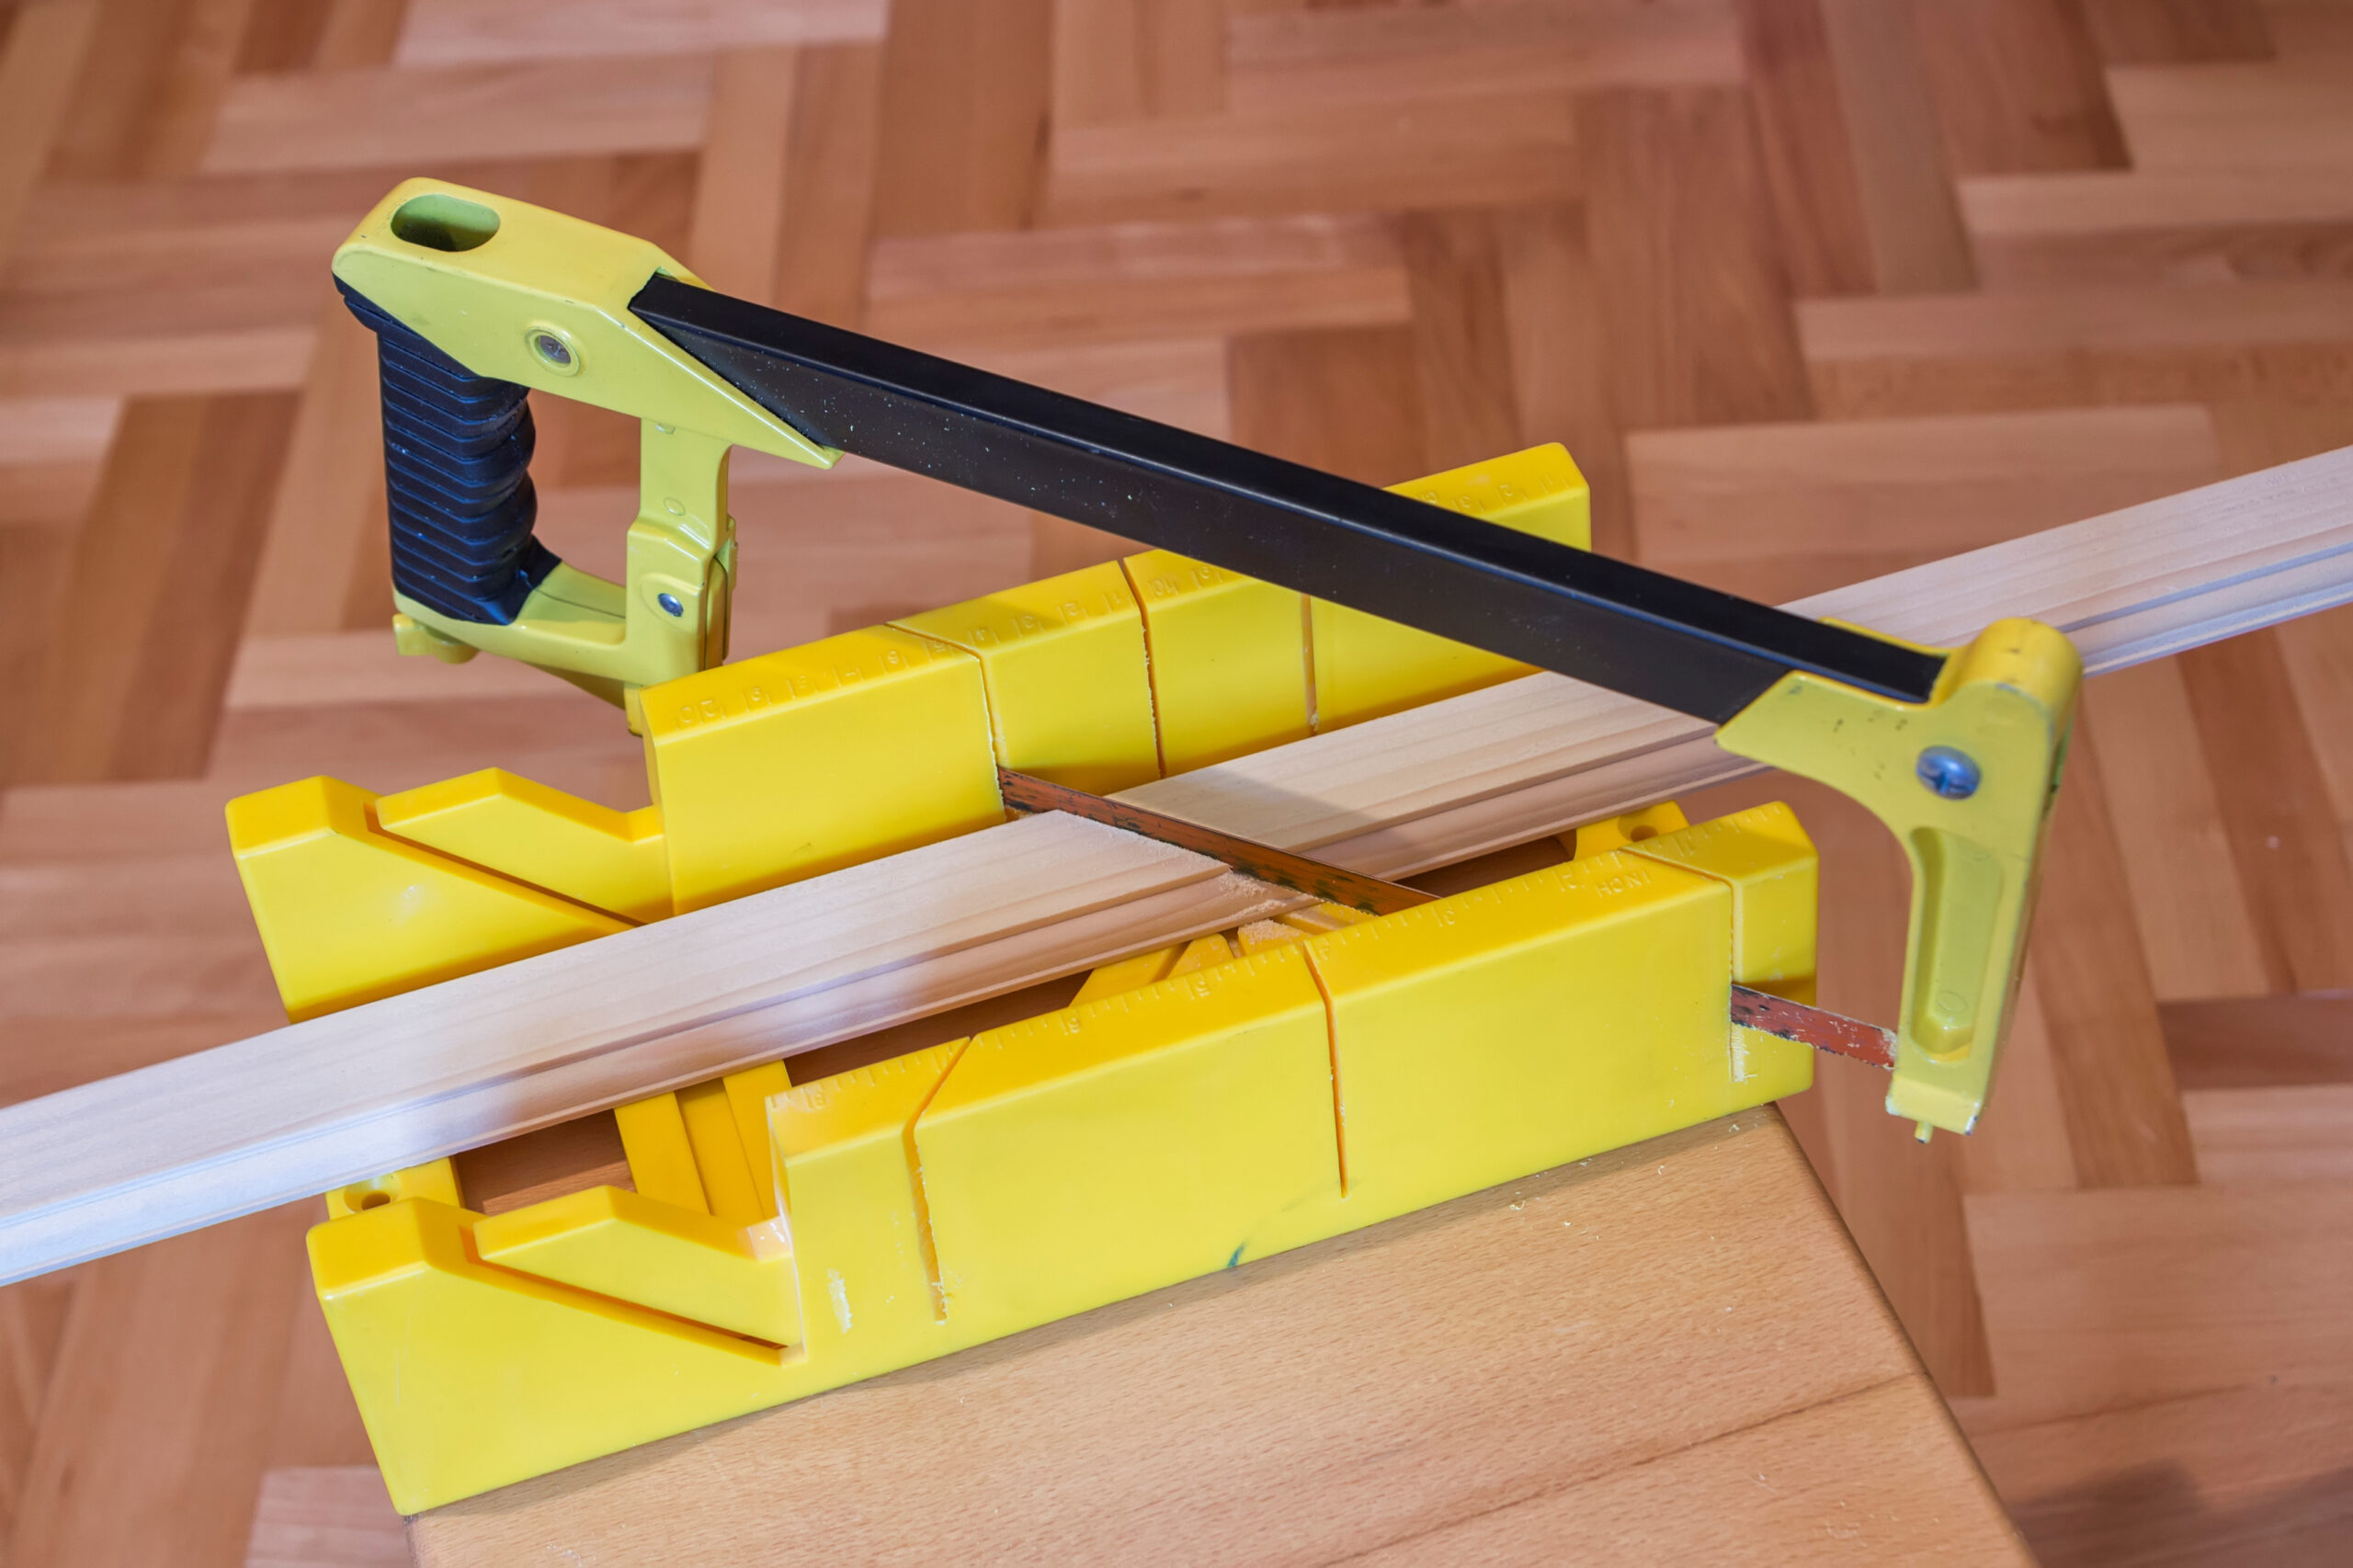
- Mitre box and hand saw (or a mitre saw, if you have one)
- Tape measure
- Pencil
For our project, we used fence pickets rather than 1×2 common boards, for the herringbone pieces. Fence pickets are really cheap and rustic looking, but they are about 3 inches wide, so we cut them in half lengthwise. Doing this requires a table saw, which most people do not own, so I recommend using 1×2 common boards for your project.
1. Measure Herringbone Pieces
I made a handy diagram to illustrate the next few instructions. Whatever size herringbone design you decide to make, there is a little bit of math you can use to calculate how long each small herringbone piece should be. I’ve created the formula for you, so all you need to do is plug in the overall width (not height) of your masterpiece, which in our diagram is represented by the letter ‘W’. Note, this equation works only for herringbone pieces that are 1.5 inches wide. See below for the equation for other sizes.
[width of the board (W) x 0.3536] – 1.0606 = length of herringbone piece
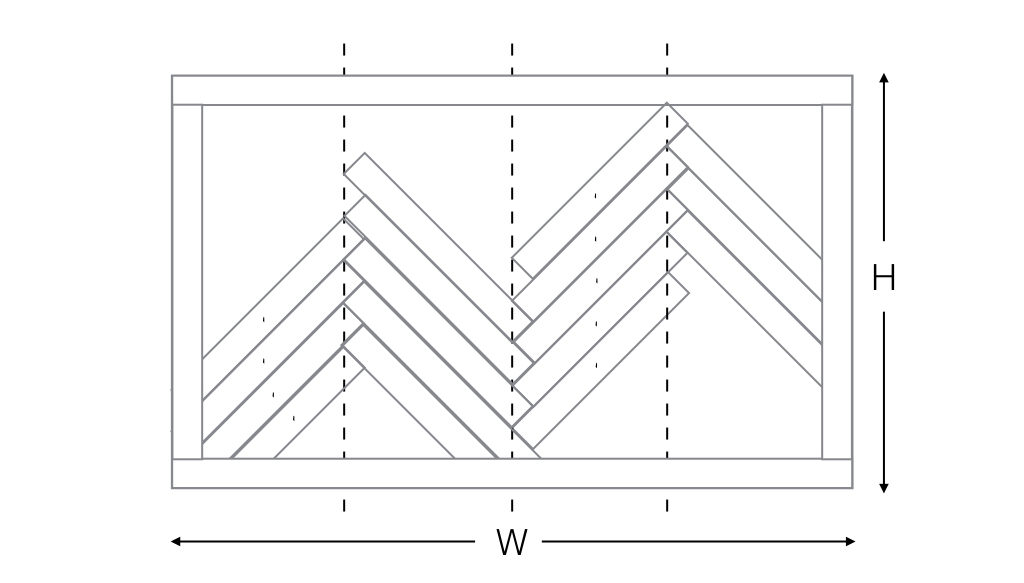
So, for example, if your overall herringbone design has a width of 36 inches, then W = 36. Your individual little herringbone pieces will be 11.67 inches long.
If you plan to use any other size than 1×2’s for your individual herringbone pieces, like 1×3’s for example, you’ll need to use the next equation. In this case, ‘y’ will represent the width of each herringbone piece. So, ‘y’ would be 2.5 inches for a 1×3.
[width of board (W) x 0.3536] – [width of herringbone piece (y) x 0.7071] = length of herringbone piece
In this example, if we are using 1×3’s and our overall herringbone design has a width of 60 inches, then W = 60 and y = 2.5. After you crunch through the equation, the length of each herringbone piece will be 19.448 inches, or just 19.5 inches to make life easier.
If you wanted to create a herringbone wood wall, you would use the same approach. The width of the entire wall would be your ‘W’ in the equation above.
2. Cut the Wood Pieces
Now it’s time to cut your 1×2 pieces to the calculated length. For the cutting, I recommend using a mitre saw if you have one or can borrow one. It will just save you tons of time. Otherwise, you will need to buy a small mitre box and hand saw, because you will be making lots of both 90 and 45 degree cuts.
3. Stain the Wood
For stain, we used three different stains and some paint to create five different “colors.” The stain colors we used were Minwax Classic Gray, Minwax Weathered Oak
and, Minwax White Wash Pickling Stain
. You can have as many different “colors” as you wish, but I recommend at least 3 for good variation.
We used the weathered oak and the pickling stain alone of some of the wood planks, but then combined the pickling stain + weathered oak on some other of the pieces. It’s also a good idea to use some of the same paint color as the cabinets, and dry brush it onto several of the herringbone pieces. This helps tie all of the pieces together with the cabinet color.
We ended up with was five different colored pieces of wood, most of which were in the gray family. However, if you wanted your herringbone pattern to look pink, for example, I would stick with the pickling stain, weathered oak, and some pink paint (dry brushed onto the wood). Your herringbone board can be made in any color family you choose!
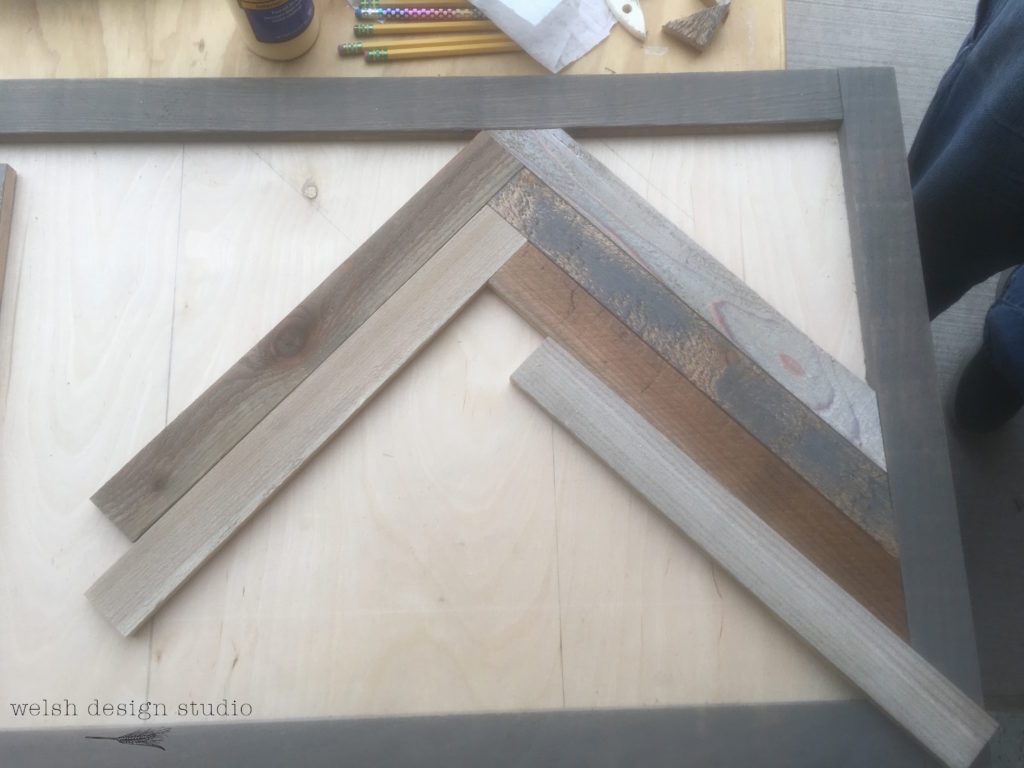
4. Install the Border
To start, we cut a few of the long boards to form a border for our backsplash. You should install these edge pieces first using generous amounts of wood glue and some small nails, and let them dry overnight.
5. Lay Out & Install the Herringbone Pieces
Next, we drew a pencil line down the center of our board, and also to mark the fourths of the board (as shown by the dotted lined in the diagram above). The first board we put down was the top left (in the picture below). You will want to anchor this one down with some small nails, since it will take time for the wood glue to dry.
Some of your herringbone pieces won’t even need to be cut (hooray), but for many others, you will need to cut them at a 45 degree angle using the mitre box/saw. Just keep working one at a time, continuing the pattern until your board is complete. It’s normal to have a few small triangles to cut near the end to fill little gaps.
6. Hang it on the Wall
After letting your herringbone board dry overnight, and standing back to admire the final product, it’s ready to hang! If your overall board is small, I recommend using Command Adhesive picture hanging strips. If not, attach a few D-ring hangers to the back side of your board, and hang with hammer and nails, or thread some wire through the D-rings to hang.

Source: Etsy
That’s it! Six easy steps and you can have a fabulous herringbone pattern to use as a backsplash or artwork for your walls. You could add a white or gray wood letter to the middle for your last name, or the first letter of your child – endless possibilities! Just don’t be afraid to tackle this project because it’s easier than it looks.
The herringbone or zigzag pattern, is a great way to add character and visual interest to any room in your home. While the process might seem daunting at first, following the steps outlined in this post can really simplify it, allowing even beginners to achieve professional-looking results. Remember, the key to a successful herringbone flooring or a herringbone wall lies in careful planning and precise measurement of each piece. With a little investment of time, the end result will bring some timeless beauty to your home.


What a gorgeous way to accent an area. Thank you so very much for linking to the Spring and Easter Joys party. Have a very Happy Easter!
Thank you so much!
This turned out so fantastic. It is a gorgeous art piece.
Thanks! It really did look like wall art to us, too. We have some left over pieces of wood and are planning to make another herringbone board to hang on our walls! 🙂
Ahhhhh I’ve always loved herringbone but assumed it was quite complicated to put together. Love how it turned out and thanks for doing the math bit 😉 That’s going to help alot
Glad we could help with the math! 🙂 We were expecting this project to be a challenge, but were pleasantly surprised how much easier it was than we were expecting. The best kind of project!
What an absolutely stunning wood treatment! Mind blown.
I’ve featured this in this weekend’s DIY Salvaged Junk Projects. Thanks for linking up! 🙂
Wow, that’s so awesome! Thank you so much for featuring our post!
What number of boards did you buy
Thanks for asking! For this particular project we used the equivalent of 8 1×2 common boards (or 4 fence pickets ripped in half lengthwise).
I’m awful at math – so are the width of the boards 1.5″? Regardless of the length?
Thanks for your help!
Hi Ange, I noticed that I used the word “board” a lot, so I’m not surprised it could be a little confusing. 🙂 I’ve made a few updates to the post to help clear up the words and the math, including an example. When I talk about the width of the “board” in the math calculation, I’m referring to the overall width of your finished masterpiece. You are correct that the individual little herringbone pieces will always be 1.5″ wide. Hope that helps! Feel free to reach out if you have any questions, or if this didn’t help clear things up.
Hi there – I’m making a herringbone headboard for a queen size bed. I’m using reclaimed fir flooring ripped to 3” wide boards. Does the equation change at all if the width of the boards is 3” instead of 1.5”? Thanks!
The answer is yes, the equation changes. Please see the updated post…I added a new equation that can be used with any other width board.
So is the first formula ([width of board (W) x 0.3536] – 1.0606 = length of herringbone piece)
for 1×2 size pieces? what would the formula be for 1″ x 1″ ?
A little further down in that same section, you’ll see a formula for calculating other wood sizes. Hopefully that answers your question.
Any chance you could give me lengths for a 7″ frame?
For what size boards? 1″ x 1″
It will depend on the actual board/piece width. Are your 1×1 pieces actually 0.75″x0.75″ or truly 1″x1″? If they are 0.75×0.75, then the length of each piece for a 7″ frame would be just about 2 inches. For pieces that are truly 1″x1″, then the length of each piece would be closer to 1.75 inches.
I don’t understand how you get 2.5in from a 1X3 board as the width?
This is because the actual size of lumber is different than its stated size. A 1 x 3 board actually measures 3/4 x 2 1/2 inches.
im still unclear how to lay the first herringbone piece? I know you mark the middle of the board then the fourths but where exactly do it place the first board?
I like the lay the first herringbone piece as a whole piece, and set its corners in place against the lines I’ve drawn. So, in the last picture in this post, the first herringbone piece I placed was the one on the top left.
I have a question. If I’m doing the herringbone design in the opposite direction (for a table), would I want to use the length rather than the width? I’m trying to calculate how much lumber I’m gonna need lol and was scouring the internet for help. So grateful for your math equation!
Using the equation for the different widths of board you have posted. The project in working on is 12’ so 144”. The equations say should be 48.44”. I’m just looking for a little guidance if the length will be too long for this project
What is the best way to calculate number of boards needing to be cut? Trying to determine how many boards I need to buy.
W = 176 ½” (total width of master piece)
H = 103” (total height of master piece)
[176.5 (W) x 0.3536] – [5.5 (y) x 0.7071] = length of herringbone piece
62.4104 – 3.88905 = length of herringbone piece
58.52135 or 58.5 inches for each herringbone piece.
How many pieces should I need to cut?
if i’m using these boards https://www.homedepot.com/p/ARAUCO-9-16-in-x-5-1-4-in-x-8-ft-Radiata-Pine-Nickel-Gap-Ship-Lap-Board-1186659/300803794
and the overall width of the accent wall is 79 in., How long should each individual piece be cut?